


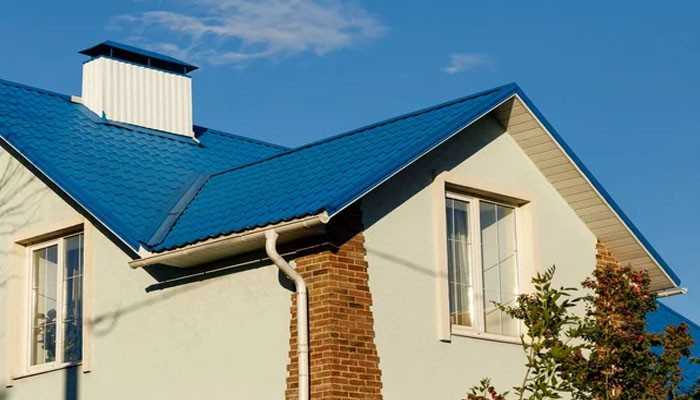

Nine out of ten homeowners I’ve talked to guess at their roof budget the same way. They picture a number, cross their fingers, and hope the bid that lands in their inbox matches it. Then the first estimate shows up and their jaw drops. The gap between the guess and the invoice is almost always caused by four things nobody warns them about: the pitch of the roof, the layers already on top of it, the price of disposal, and this city’s talent for dumping rain on your schedule. None of those are secrets. They’re just not visible from the sidewalk.
The fix is not to find a magic calculator online. It’s to build the number yourself, from the ground up, before any contractor walks your property. Below, I’ll show you exactly how I’d approach it if the house were mine. I’ll walk through the price drivers that actually move a bid, the Seattle specific ones that don’t apply anywhere else, and a framework I use called the Four Bucket Method that keeps you from getting blindsided at the kitchen table. You’ll finish this piece with a working budget range and a clear sense of what to ask when the estimates come rolling in.
What Actually Moves the Number
Every roof estimate you’ll ever receive is built from the same raw materials: labor, product, tear off, disposal, and permits. The size of your house sets the floor. Everything else stacks on top. Here’s what pushes a bid up in this region specifically:
- Roof pitch: A steep roof demands more safety rigging, slower work, and sometimes a second crew member just for footing. That cost lands in your quote.
- Number of layers: Multiple old shingle layers mean extra tear off hours and extra dump fees. City code typically caps how many layers you can legally carry, so this often forces a full strip.
- Material choice: Asphalt architectural shingles sit at the bottom of the pricing ladder. Metal, cedar shake, and standing seam climb fast. The gap between the cheapest and the most expensive option on the same house can be startling.
- A narrow driveway, a fence in the way, or a power line over the workspace all slow the job down. Slow jobs cost more.
- Time of year: Roofers book out ahead of the rainy season. If you’re calling in October with a leak, you’re paying a rush premium.
If you want a real Seattle number instead of a national average, this breakdown of roof replacement cost in the area is the most grounded starting point I’ve found, because it’s built from actual local jobs rather than a formula. National averages get published every year and they’re always too low for this market. Labor rates here are higher, dump fees are higher, and the weather tax is real.
The Seattle Weather Tax Nobody Warns You About
You can’t plan a roof in this city the same way someone plans one in Phoenix. Our climate does two things that directly affect price. First, it narrows the dry window. Crews try to close in a roof before the next system rolls through, which means scheduling pressure during the good months and stubborn delays during the bad ones. Second, all that moisture works on the underlying decking. Rot shows up under old shingles far more often here than in dry parts of the country, and replacing sheathing is an added line item you won’t see until the tear off is underway.
The National Weather Service keeps long range precipitation records for the region at weather.gov, and if you glance at the historical data you’ll see why roofing schedules compress into a few months. That’s not trivia. It’s the reason a job quoted in June can cost noticeably more if you wait until November to sign. If you’re flexible, book early and get on the calendar before the rush. If you’re not flexible because water is coming through the ceiling, you pay what the market demands and you accept it.
Ventilation and insulation also matter more here. A roof that traps moisture inside the attic creates problems that come back as rot, mold, and a shorter lifespan for the whole assembly. Any honest contractor is going to talk to you about attic airflow before they ever quote shingles. If they don’t bring it up, ask. It changes the scope, and scope changes the price.
The Four Bucket Method for Building Your Budget

I made this one up out of pure frustration after watching too many homeowners get caught off guard. Instead of hunting for a single number, you split your budget into four buckets and fill each one separately. The total lands closer to reality than any guess.
| Bucket | What goes in it | How to estimate it
|
| Base | Material and labor for your chosen surface | Use a local price range per square, then multiply |
| Tear Off and Disposal | Removing old layers and hauling them away | Ask a contractor how many layers they see |
| Structure and Repair | Decking, flashing, vents, chimney work | Set aside a contingency you can afford to spend |
| Site and Permits | Rigging, access issues, neighborhood permits | Ask your city office and each bidder directly |
The base bucket is the one every website quotes. The other three are where budgets actually break. A job that looked like one number ends up 20 percent higher because the crew found rot under three courses of shingles. Budget for the surprise and the surprise stops being one.
How to Vet a Bid Before You Sign
Estimates are not apples to apples, even when the totals look similar. Two bids that both say “new roof” can include wildly different scopes. Here’s what I check before I compare anything:
- Does the quote spell out material brand and grade, not just “architectural shingle”?
- Is tear off included, and to what depth?
- Are flashing, vents, and pipe boots listed? These are the failure points on almost every roof.
- Is the disposal fee a fixed line item or an open estimate?
- What does the warranty cover, and who honors it five years from now?
- Is the contractor licensed, bonded, and carrying current liability coverage?
The Department of Housing and Urban Development publishes homeowner guidance on hiring contractors and financing home improvements at hud.gov, and it’s worth reading before you talk numbers with anyone. A contractor who resists putting scope in writing is telling you something. Listen to it.
The Question of When to Replace Instead of Patch
Half the homeowners who call me are hoping for a repair, and I get it. A patch is cheaper up front, sometimes by a wide margin. But a patch is a bet that the rest of the roof outlives it. If your shingles are at the end of their service life and you’re looking at repeated repairs during the same rainy season, the smart play is to stop feeding the old roof and put the money toward a replacement instead. My honest read after walking dozens of these situations: if the roof is older than its rated lifespan minus a couple of years, and you’ve already paid for two repairs, replace it. You’re throwing good money after bad.
Another practical step. Look into whether a home energy audit includes attic inspection in your area. The Department of Energy publishes resources at energy.gov on how insulation and attic ventilation affect home performance. A better ventilated attic extends the life of your new roof and sometimes lowers your heating and cooling loads. It’s a small cost that pays back on a long timeline, and most people skip it entirely.
Putting It All Together
Now you have the shape of it. Size your square footage, choose a material tier, add tear off and disposal, hold back contingency for rot, and add site and permit costs. That total is your real budget. Not the number on a national cost chart, not the first bid that lands in your inbox.
Here’s the move I’d make this week. Walk outside, look at your roof, and write down the pitch, the material, and any visible sagging or missing shingles. Then call three local contractors and ask each one for a written scope, not just a lump sum. Compare the buckets, not the totals. If you want a grounded starting figure before those calls, pull a local cost range specific to your city rather than a national average. Your house is not the national average. Neither is your budget.
