Shopify is one of the most popular e-commerce platforms in the world. It offers an easy-to-use interface, excellent features, and high security, which makes it a great choice for businesses looking to sell their products online.
However, to stand out in the crowded marketplace, it’s essential to hire Shopify developers who can build a custom storefront–one that reflects your brand and delivers an exceptional shopping experience.
In this blog post, we’ll provide a step-by-step guide to building a custom Shopify storefront that can help you attract more customers and increase sales. Let’s jump right in.
A 5-Step Easy Guide to Building a Custom Shopify Storefront that Converts
Step 1: Plan Your Storefront Design

Take a look at the following example by Pipcorn Heirloom Snacks:
The structure and layout are clean and minimal. Plus, the branding colors and aesthetics are on-point:
Remember that your design should reflect your brand identity while creating a cohesive shopping experience for your customers.
So, when planning your design, consider the following elements:
- Branding: Think about your storefront color scheme, logo, typography, and more.
- User Experience: The user experience (UX) should be at the forefront of your design. Your storefront should be easy to navigate and provide a seamless shopping experience. Do not clutter the design with too many sub-pages and excessive data.
- Visuals: Always use high-quality images and graphics to showcase your products and create an attractive storefront. You can do a photo shoot of your products or purchase high-quality images from websites such as Shutterstock.
- Responsive Design: Another critical point to note is to ensure that your storefront is optimized for different devices, including desktop, tablet, and mobile. If your customers have to keep zooming in and pinching out to read the content, you can bid goodbye to the customer.
Step 2: Customize Your Theme
Shopify offers a wide range of themes to choose from, and while these are a great starting point, they won’t necessarily meet all your needs. To build a custom Shopify storefront, you’ll need to customize your theme.
You can customize your theme in several ways, including:
- Editing your theme code: If you have experience with HTML, CSS, and Liquid, you can edit your theme code to make custom changes. Alternatively, you can hire a Shopify developer to help you out.
- Using the Shopify Theme Editor: Shopify’s theme editor allows you to make changes to your storefront without touching the code.
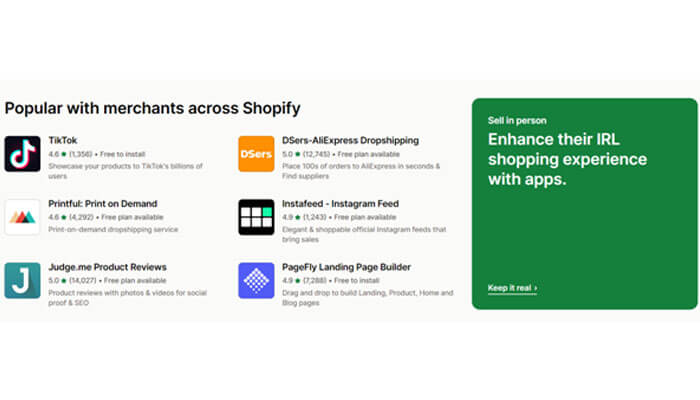
- Installing apps: Shopify offers a wide range of apps that can help you customize your storefront further:
Step 3: Add Custom Features
To make your storefront stand out, you may want to add custom features. These could include:
- Custom product pages: If you sell unique or complex products, you may want to create custom product pages that provide additional information and customization options.
- Custom checkout: You can also customize the checkout process to create a more streamlined and user-friendly experience for your customers.
- Custom navigation: You can customize your storefront’s navigation to make it easier for customers to find what they’re looking for.
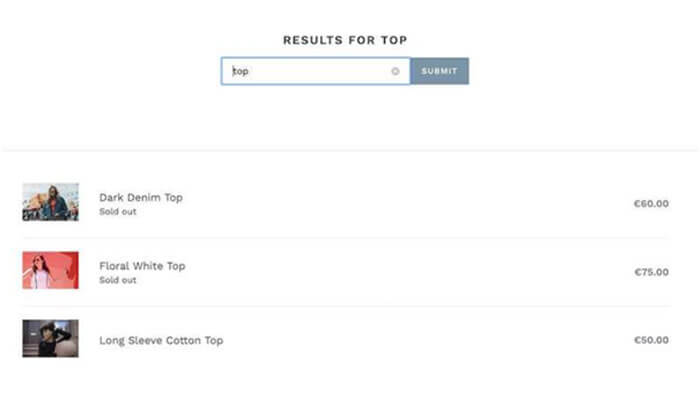
- Custom search: Adding a custom search feature can help customers find products more quickly and easily. Here’s an example of a customer searching for the word “top”.
On clicking these products, users will be directed to the respective product pages.
Step 4: Test Your Storefront
Before launching your custom Shopify storefront, it’s essential to test it thoroughly to ensure it’s working correctly. Some things to test include:
- Navigation: Ensure your navigation is working correctly and that customers can find products and information easily.
- Checkout: Test the checkout process to ensure it’s working correctly and that customers can complete their purchases without any issues.
- Responsiveness: Finally, as mentioned before, it is important to test your storefront on different devices to ensure it’s optimized for desktop, tablet, and mobile.
Step 5: Launch Your Storefront
Once you’ve tested your custom Shopify storefront, you’re ready to launch it. Ensure you’ve connected your payment gateway and set up shipping options before launching.
After launching, monitor your storefront’s performance and make changes as needed to improve the user experience and increase sales.
Bonus Material: 7 Tips to Remember When Customizing Your Shopify Storefront
Tip #1: Plan your design:
Before you start building your custom storefront, you should:
1. Plan out the design and layout
2. Think about how you want your site to look and feel
3. Understand the kind of branding elements you want to incorporate
4. Analyze how you want to organize your content
Tip #2: Choose the right theme:
Shopify offers a variety of themes to choose from, but you may want to consider a custom theme if you want more control over your site’s design. Make sure the theme you choose is mobile-friendly and easy to navigate.
Tip #3: Customize your layout:
With a custom theme, you can easily customize your site’s layout using Shopify’s drag-and-drop editor. You can add custom sections, move elements around, and adjust your site’s colors and fonts.
Tip #4: Optimize for SEO:
To make sure your site is easy for search engines to find and rank, you’ll want to optimize your content for SEO. This includes using relevant keywords, creating high-quality content, and making sure your site is structured correctly.
Tip #5: Add custom features:
Shopify’s App Store offers a wide range of apps and plugins that you can use to add custom features to your site. Consider what functionality you want to include, such as social media integration, product reviews, or a custom checkout process.
Tip #6: Test your site:
Before you launch your custom storefront, make sure to test it thoroughly. Check for broken links, test your site’s load times, and make sure it looks good on all devices.
Tip #7: Provide great customer support:
Once your site is up and running, make sure to provide excellent customer support. Respond quickly to customer inquiries, offer helpful advice, and be responsive to feedback.
By following these tips, you can create a custom Shopify storefront that stands out from the crowd and provides an excellent user experience for your customers.
Wrapping Up
A custom Shopify storefront requires careful planning and consideration before you actually start fleshing out the details. You will need to have a clear idea of what you want your storefront to look like, how it will function, and what features you want it to have.
You will also need to deep-dive into key elements such as the design, coding, layout, and the necessary features, as well as the functionality.
A word of caution: You may encounter technical issues, design challenges, or difficulties integrating third-party apps and tools. But with a skilled team and a little preparation, you can overcome these challenges and create a storefront that meets your needs and exceeds your expectations.
Long story short, building a custom Shopify storefront takes time and effort, but it’s worth it. By following this step-by-step guide, you can build a custom storefront that reflects your brand, provides an excellent user experience, and increases sales–all at the same time!


