


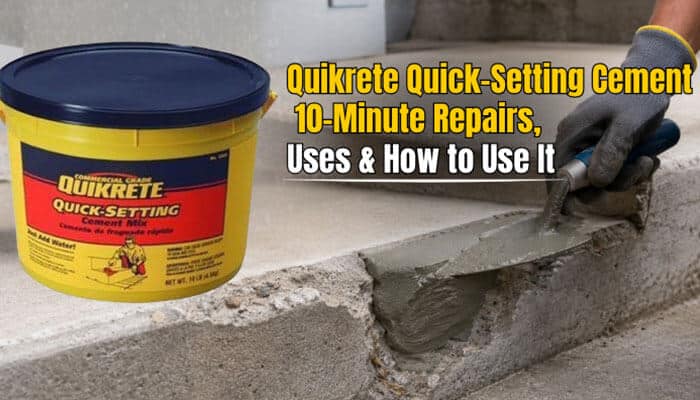

Quikrete Quick-Setting Cement is designed for concrete repairs where speed, strength, and the ability to rebuild damaged edges matter. This Portland cement-based repair material begins its initial set in about 10 minutes, making it particularly useful for broken concrete steps, curbs, corners, walls, floors, and other vertical or horizontal repairs.
However, the fast-setting claim can easily be misunderstood. Although Quikrete Quick-Setting Cement begins becoming firm very quickly, curing and strength development continue much longer. Surface preparation, water quantity, bonding method, repair thickness, temperature, compaction, finishing, and curing all influence the quality of the final repair.
This complete guide explains Quikrete Quick-Setting Cement set time, mixing ratio, water requirements, strength, coverage, cure time, uses, application methods, common mistakes, and product comparisons so you can decide whether it is right for your concrete repair.
Quick Answer: How Fast Does Quikrete Quick-Setting Cement Set?
Quikrete Quick-Setting Cement has an initial set of approximately 10 minutes and a final set of about 15–30 minutes.
According to the manufacturer’s technical information:
- Initial set: About 10 minutes
- Final set: Approximately 15–30 minutes
- 1-day compressive strength: About 3,000 PSI
- 28-day compressive strength: About 6,000 PSI
- Required damp curing: At least 48 hours
QUIKRETE also recommends mixing only as much material as you can place within approximately 10 minutes.
This means Quikrete Quick-Setting Cement becomes firm very quickly, but the 10-minute figure does not mean the repair is fully cured or ready for every type of load.
Key Takeaways
- Quikrete Quick-Setting Cement is Product No. 1240.
- It is designed primarily for rapid repairs to existing concrete.
- Initial set occurs at approximately 10 minutes.
- Final set generally occurs within 15–30 minutes.
- The material can be molded and sculpted as it hardens.
- It works on both horizontal and vertical concrete surfaces.
- Published compressive strength reaches approximately 6,000 PSI after 28 days.
- Repairs less than 1 inch require special attention to bonding and Acrylic Fortifier.
- Damp curing should continue for at least 48 hours.
- Quick-Setting Cement, Fast-Setting Concrete Mix, and Hydraulic Water-Stop Cement are different products designed for different applications.
Quikrete Quick-Setting Cement Specifications
The table below provides a quick overview of the key Quikrete Quick-Setting Cement specifications.
| Specification | Technical Information |
| Product | Quikrete Quick-Setting Cement |
| Product number | 1240 |
| Product type | Portland cement-based repair material |
| Main purpose | Rapid structural concrete repair |
| Initial set | About 10 minutes |
| Final set | Approximately 15–30 minutes |
| 1-day strength | About 3,000 PSI |
| 7-day strength | About 4,000 PSI |
| 14-day strength | About 5,000 PSI |
| 28-day strength | About 6,000 PSI |
| Pull-off strength at 28 days | ≥250 PSI |
| Freeze-thaw durability | ≥95% durability factor after 300 cycles |
| Damp curing | At least 48 hours |
| Common package sizes | 10 lb, 20 lb, and 50 lb |
These numbers help explain why Quikrete Quick-Setting Cement is intended for more than superficial cosmetic patching.
What Is Quikrete Quick-Setting Cement?
Quikrete Quick-Setting Cement is a rapid-setting cement-based material formulated for repairing existing concrete.
Unlike ordinary concrete mixes commonly used to pour slabs, pads, or footings, this product is particularly useful when damaged concrete needs to be:
- Rebuilt
- Patched
- Sculpted
- Shaped
- Repaired vertically
- Returned to service relatively quickly
The ability of Quikrete Quick-Setting Cement to stiffen quickly is particularly valuable when repairing a broken corner, curb, step nose, or edge because the material can begin holding its shape instead of continuing to slump.
What Is Quikrete Quick-Setting Cement Used For?
There are many possible Quikrete Quick-Setting Cement uses, ranging from small residential repairs to commercial concrete maintenance.
Common Home Repairs
Typical residential applications include:
- Broken concrete step corners
- Chipped step noses
- Damaged curb edges
- Broken slab edges
- Concrete wall patches
- Localized floor repairs
- Retaining-wall repairs
- Vertical concrete repairs
Commercial and Infrastructure Repairs
The product may also be used for repairs involving:
- Pavement
- Loading docks
- Bridges
- Concrete pipes
- Culverts
- Catch basins
- Sewers
- Septic tanks
- Tunnels
- Cold-storage areas
- Prestressed concrete panels
For most homeowners, Quikrete Quick-Setting Cement is especially useful for localized concrete damage that needs to retain a defined shape while the repair hardens.
Why Is Quikrete Quick-Setting Cement Good for Vertical Repairs?
Vertical concrete repairs can be difficult because a wet repair mixture may slump downward before it becomes firm.
Quikrete Quick-Setting Cement can reportedly be built approximately 1–2 inches thick on vertical surfaces without excessive sagging.
That makes it useful for:
- Concrete step faces
- Broken curb corners
- Wall edges
- Vertical cavities
- Raised profiles
- Concrete corners
As Quikrete Quick-Setting Cement begins setting, it can also be trimmed or sculpted to recreate the original profile of the damaged concrete.
Does Quikrete Quick-Setting Cement Really Set in 10 Minutes?
Yes, but the word set needs clarification.
The detailed technical information separates the process into:
- Initial set: Approximately 10 minutes
- Final set: Approximately 15–30 minutes
For DIY work, this means the useful working and finishing period for Quikrete Quick-Setting Cement can be very short.
What the 10-Minute Set Time Does Not Mean
A 10-minute initial set does not mean:
- The cement is completely cured.
- Full compressive strength has developed.
- Heavy traffic can immediately use the repair.
- The cement no longer needs moisture.
- Damp curing can be skipped.
- You should mix the entire package at once.
Quikrete Quick-Setting Cement continues developing strength long after the material feels hard.
Quikrete Quick-Setting Cement Set Time vs Cure Time
Set time and cure time are not interchangeable.
| Stage | Meaning | Approximate Timing |
| Working period | Time available for mixing and placement | Very short |
| Initial set | Material begins becoming rigid | About 10 minutes |
| Final set | Setting has progressed substantially | 15–30 minutes |
| Step traffic protection | Recommended protection period | About 24 hours |
| Damp curing | Moisture-maintenance period | At least 48 hours |
| 1-day strength | Early compressive strength | ~3,000 PSI |
| 28-day strength | Longer-term compressive strength | ~6,000 PSI |
The important point is simple:
Fast-setting Quikrete Quick-Setting Cement is not the same as instantly cured cement.
How Strong Is Quikrete Quick-Setting Cement?
One of the biggest advantages of Quikrete Quick-Setting Cement is that rapid setting does not prevent the product from developing substantial compressive strength.
| Age | Typical Compressive Strength |
| 1 day | 3,000 PSI |
| 7 days | 4,000 PSI |
| 14 days | 5,000 PSI |
| 28 days | 6,000 PSI |
Technical information also reports:
- ≥250 PSI pull-off strength at 28 days
- ≥95% freeze-thaw durability factor after 300 cycles
These numbers can be useful when comparing Quikrete Quick-Setting Cement strength with lighter-duty patching products.
Why Bond Strength Matters
High compressive strength alone does not guarantee a successful repair.
If Quikrete Quick-Setting Cement is applied over:
- Loose concrete
- Dust
- Oil
- Weak material
- Crumbling edges
- Contaminated surfaces
the patch may still separate from the original concrete.
Proper preparation is therefore just as important as product strength.
Quikrete Quick-Setting Cement Mixing Ratio
The correct Quikrete Quick-Setting Cement mixing ratio is critical because too much water can reduce product performance.
Water Required by Package Size
| Package Size | Minimum Water | Maximum Water |
| 10 lb | 1⅓ pints / 0.6 L | 1⅔ pints / 0.8 L |
| 20 lb | 2¾ pints / 1.3 L | 3¼ pints / 1.5 L |
| 50 lb | 6¾ pints / 3.2 L | 8¼ pints / 3.9 L |
The published volume range is approximately 1 part water to 5½ parts material at the lower-water end and 1 part water to 3½ parts material at the maximum-water end.
What Should Quikrete Quick-Setting Cement Look Like When Mixed?
Aim for a mixture that is:
- Smooth
- Cohesive
- Easy to place
- Firm enough to stay where applied
- Free from excessive water
Do not automatically use the maximum amount of water.
How to Mix Quikrete Quick-Setting Cement
Knowing how to mix Quikrete Quick-Setting Cement before opening the package can save valuable working time.
Step 1: Measure the Water
Use an accurate measuring container.
Do not estimate by eye.
Step 2: Put Water Into the Mixing Container
Add the required amount of water to the mixing bucket first.
Step 3: Add Quikrete Quick-Setting Cement
Gradually add the dry material while mixing.
Step 4: Mix to the Correct Consistency
The mixture should be smooth and workable without becoming overly wet.
Step 5: Start Applying Immediately
Do not mix Quikrete Quick-Setting Cement and then begin cleaning or preparing the repair area.
Complete the preparation first.
The manufacturer recommends mixing only as much material as you can use within approximately 10 minutes.
Quikrete Quick-Setting Cement and Acrylic Fortifier
Repair thickness affects the bonding method used with Quikrete Quick-Setting Cement.
Repairs Less Than 1 Inch Thick
Technical guidance says Concrete Acrylic Fortifier should be used for applications less than 1 inch thick.
Under the general technical-data method, approximately half of the mixing water is replaced with Acrylic Fortifier.
Quikrete Quick-Setting Cement for Edge and Corner Repairs
For certain edge-and-corner repair applications, QUIKRETE publishes another method using approximately:
5 parts Quikrete Quick-Setting Cement to 1 part Acrylic Fortifier
This produces a putty-like consistency that can help when rebuilding damaged corners.
Because application methods may differ, always follow the current instructions for your specific repair.
Quikrete Quick-Setting Cement and Concrete Bonding Adhesive
For repairs greater than approximately 1 inch thick, technical guidance directs users toward Concrete Bonding Adhesive.
When using this bonding method, the repair area should not automatically be pre-wetted.
Important
Do not combine Concrete Acrylic Fortifier and Concrete Bonding Adhesive unless the current manufacturer instructions specifically tell you to do so.
Using Quikrete Quick-Setting Cement correctly means choosing the bonding system that matches the repair depth and application.
How to Use Quikrete Quick-Setting Cement Step by Step
Step 1: Remove Weak Concrete
Before applying Quikrete Quick-Setting Cement, remove:
- Loose pieces
- Crumbling material
- Flaking concrete
- Dirt
- Oil
- Grease
- Dust
- Other contaminants
The patch needs to bond to solid concrete.
Step 2: Roughen Smooth Surfaces
Extremely smooth concrete may provide poor mechanical bonding.
Roughen the repair surface where appropriate without unnecessarily damaging sound concrete.
Step 3: Clean the Repair Thoroughly
Use a stiff brush to remove dust and debris.
The cleaner the substrate, the better chance Quikrete Quick-Setting Cement has of developing a reliable bond.
Step 4: Prepare the Substrate
For applications that do not use Concrete Bonding Adhesive, the surface is generally dampened without leaving standing water.
Think:
Damp—not flooded.
Step 5: Mix a Small Batch
Only mix enough Quikrete Quick-Setting Cement to complete the immediate repair section.
Step 6: Pack the Cement Into the Repair
Press the material firmly into:
- Corners
- Voids
- Edges
- Cavities
- Irregular surfaces
Firm trowel pressure helps minimize air pockets.
Step 7: Completely Fill the Repair
Avoid partial-depth fills where practical.
Incomplete filling may create weak interfaces or cold joints.
Step 8: Screed the Surface
Bring the repair level with the surrounding concrete.
Step 9: Shape and Finish
As Quikrete Quick-Setting Cement begins stiffening, shape the patch to match the surrounding concrete.
Step 10: Cure Properly
Continue appropriate damp curing for at least 48 hours.
The “Thumbprint Hard” Quikrete Quick-Setting Cement Technique
One of the most useful features of Quikrete Quick-Setting Cement is its ability to be sculpted while it stiffens.
For edge repairs, the material can be allowed to reach a “thumbprint hard” condition.
This may occur around 5–10 minutes into the repair process.
At that stage, you can:
- Trim excess material
- Straighten edges
- Recreate corners
- Shape curves
- Match surrounding profiles
A margin trowel is useful for detailed shaping.
For exterior steps and sidewalks, a masonry brush can help reproduce the existing broom texture.
Don’t Add Water to Quikrete Quick-Setting Cement While Finishing
Adding water to the surface may seem like an easy way to make the repair smoother.
Avoid doing this.
Excess surface water can contribute to:
- Uneven appearance
- Weaker surface material
- Shrinkage
- Cracking
Instead of adding more water, finish Quikrete Quick-Setting Cement at the correct stage of hardening.
How to Repair a Concrete Step With Quikrete Quick-Setting Cement
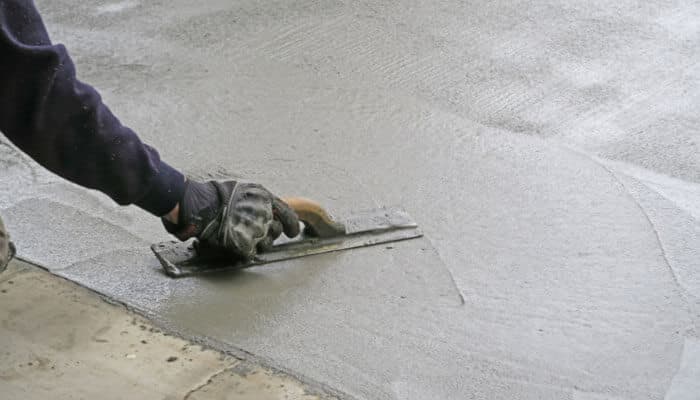
Broken concrete steps are among the most practical residential applications for Quikrete Quick-Setting Cement.
- Remove Crumbling Concrete
Chip away anything loose until sound concrete remains.
- Clean the Repair Area
Brush out dust and debris thoroughly.
- Choose the Correct Bonding Method
Use Acrylic Fortifier, dampening, or Concrete Bonding Adhesive according to the depth and application instructions.
- Mix a Small Batch
Measure carefully and prepare only what can be used immediately.
- Press Quikrete Quick-Setting Cement Into Place
Use firm pressure to create good contact with the original concrete.
- Slightly Overbuild the Corner
A small amount of extra material gives you room to shape the finished profile.
- Wait Until the Material Stiffens
Allow the patch to reach the thumbprint-hard stage.
- Sculpt the Concrete Corner
Use a margin trowel to match the original profile.
- Match the Texture
Use a masonry brush or finishing tool to blend the patch with the existing step.
- Protect and Cure
Keep the repaired area protected while Quikrete Quick-Setting Cement continues gaining strength.
When Can You Walk on Quikrete Quick-Setting Cement?
For repaired concrete steps, manufacturer guidance recommends protecting the repair from foot traffic for approximately 24 hours.
That is much longer than the initial 10-minute set of Quikrete Quick-Setting Cement.
Practical Repair Timeline
- About 10 minutes: Initial set
- 15–30 minutes: Final set
- About 24 hours: Protect repaired steps from foot traffic
- At least 48 hours: Damp curing
- 28 days: Published longer-term compressive-strength benchmark
Do not use the initial set time as a universal traffic or load rating.
Quikrete Quick-Setting Cement Cure Time
Although Quikrete Quick-Setting Cement sets rapidly, it continues developing strength afterward.
The product requires at least 48 hours of efficient damp curing.
Why Damp Curing Matters
Cement needs moisture for proper hydration.
Fresh Quikrete Quick-Setting Cement repairs can lose moisture too quickly during:
- Hot weather
- Strong wind
- Low humidity
- Direct sunlight
Keeping the repair appropriately damp supports continued strength development.
Using Quikrete Quick-Setting Cement in Hot Weather
High temperatures can shorten the already limited working time.
When using Quikrete Quick-Setting Cement during hot conditions:
- Use cool mixing water.
- Keep dry material in the shade.
- Prepare tools before mixing.
- Work with small batches.
- Begin placement immediately.
- Avoid unnecessary delays.
The warmer the conditions, the more important preparation becomes.
Using Quikrete Quick-Setting Cement in Cold Weather
Cold temperatures create different challenges.
When temperatures approach approximately 40°F (4°C) or lower, precautions may be needed to prevent freezing.
Possible measures include:
- Using warm mixing water
- Insulating the repair
- Protecting fresh cement from freezing
Fresh Quikrete Quick-Setting Cement should not be allowed to freeze before sufficient strength has developed.
Can Quikrete Quick-Setting Cement Be Used for Deep Repairs?
Yes, but more serious concrete damage requires more planning. For larger deep patches, manufacturer guidance allows a 50 lb package to be extended with up to approximately 25 lb of good-quality damp aggregate with a maximum size of 3/8 inch.
However, serious damage may signal an underlying problem such as:
- Settlement
- Corroded reinforcing steel
- Water intrusion
- Freeze-thaw deterioration
- Impact damage
- Structural movement
Quikrete Quick-Setting Cement can replace missing concrete, but it cannot correct the underlying structural cause.
Does Quikrete Quick-Setting Cement Need Sand or Gravel?
For normal repairs, Quikrete Quick-Setting Cement does not require extra sand or gravel.
| Repair Type | Add Aggregate? |
| Broken step corner | No |
| Damaged curb | No |
| Wall edge | No |
| Vertical patch | No |
| Typical localized repair | No |
| Large deep patch | May be permitted under manufacturer instructions |
Do not randomly add Portland cement, masonry cement, sand, or gravel simply to make Quikrete Quick-Setting Cement go further.
Quikrete Quick-Setting Cement Coverage
Knowing the approximate Quikrete Quick-Setting Cement coverage can help you choose the correct package size.
| Package Size | Approximate Yield |
| 10 lb | 0.09 cu. ft. / 2.5 L |
| 20 lb | 0.18 cu. ft. / 5.1 L |
| 50 lb | 0.45 cu. ft. / 12.7 L |
Approximate Coverage by Thickness
| Package | 1/4 Inch Thick | 1/2 Inch Thick | 1 Inch Thick |
| 10 lb | ~4.3 sq. ft. | ~2.2 sq. ft. | ~1.1 sq. ft. |
| 20 lb | ~8.6 sq. ft. | ~4.3 sq. ft. | ~2.2 sq. ft. |
| 50 lb | ~21.6 sq. ft. | ~10.8 sq. ft. | ~5.4 sq. ft. |
These figures are theoretical conversions rather than guaranteed jobsite coverage.
Actual Quikrete Quick-Setting Cement coverage varies according to:
- Repair shape
- Surface roughness
- Waste
- Compaction
- Depth variations
Simple Repair Volume Formula
For rectangular repairs:
Length × Width × Depth = Repair Volume
Use consistent measurement units throughout the calculation.
Quikrete Quick-Setting Cement vs Fast-Setting Concrete Mix
One of the most common product-selection questions is Quikrete Quick-Setting Cement vs Fast-Setting Concrete Mix. Although the names sound similar, the products are intended for different jobs.
| Feature | Quikrete Quick-Setting Cement | Fast-Setting Concrete Mix |
| Main purpose | Repair existing concrete | New concrete and post setting |
| Product number | 1240 | 1004 |
| Material | Cement-based repair product | Cement, sand and gravel mixture |
| Typical setting | Initial ~10 min; final 15–30 min | Approximately 20–40 min |
| Sculptable | Yes | Not primary purpose |
| Broken step edges | Strong application | Less specialized |
| Vertical patch | Suitable | Not its main purpose |
| Fence posts | Not primary use | Designed for posts |
| Small new pad | Not ideal | More appropriate |
Choose Quikrete Quick-Setting Cement For:
- Broken concrete corners
- Step-edge repairs
- Curb repairs
- Wall patches
- Existing concrete profiles
Choose Fast-Setting Concrete Mix For:
- Fence posts
- Mailbox posts
- Small new concrete pads
- New steps
- Small sidewalk sections
For a repair to existing concrete, Quikrete Quick-Setting Cement is usually the more relevant product of the two.
Quikrete Quick-Setting Cement vs Hydraulic Water-Stop Cement
Another common comparison is Quikrete Quick-Setting Cement vs Hydraulic Water-Stop Cement. Fast setting does not automatically mean a cement product is designed to stop water.
| Feature | Quikrete Quick-Setting Cement | Hydraulic Water-Stop Cement |
| Main purpose | Structural concrete repair | Stop active leaks |
| Setting speed | Initial ~10 minutes | Approximately 3–5 minutes |
| Broken step repair | Good choice | Not primary purpose |
| Sculptable repair | Yes | Specialized leak plugging |
| Active water leak | Not dedicated product | Designed for it |
If water is actively entering through a foundation crack or penetration, a hydraulic water-stop product may be more appropriate than Quikrete Quick-Setting Cement.
Is Quikrete Quick-Setting Cement Waterproof?
Quikrete Quick-Setting Cement should not be treated as a dedicated waterproofing system. Although it may be used for repairs involving concrete pipes, culverts, catch basins, sewers, and similar concrete structures, Hydraulic Water-Stop Cement is designed specifically for active water leaks.
If water intrusion is causing the concrete damage, identify and address the water source before choosing the repair material.
Quikrete Quick-Setting Cement vs FastSet Repair Mortar
FastSet Repair Mortar is another alternative when the repair is more demanding.
| Feature | Quikrete Quick-Setting Cement | FastSet Repair Mortar |
| Primary use | Rapid concrete patching | Specialized structural repair |
| Working time | Very short | Approximately 20–30 minutes |
| Vertical repairs | Yes | Yes |
| Overhead work | Possible | Better suited to demanding applications |
| Sculptable | Yes | Yes |
| 28-day strength | ~6,000 PSI | ~6,000 PSI |
For ordinary residential step, curb, and edge repairs, Quikrete Quick-Setting Cement may be easier to use. For demanding structural, vertical, or overhead repairs, a specialized repair mortar may be more appropriate.
Which QUIKRETE Product Should You Use?
| Concrete Problem | Product to Consider |
| Broken step corner | Quikrete Quick-Setting Cement |
| Damaged curb edge | Quikrete Quick-Setting Cement |
| Sculpted vertical patch | Quikrete Quick-Setting Cement |
| Active water leak | Hydraulic Water-Stop Cement |
| Fence or mailbox post | Fast-Setting Concrete Mix |
| New concrete pad | Concrete Mix or Fast-Setting Concrete Mix |
| Demanding overhead repair | FastSet Repair Mortar |
| Widespread worn concrete | Concrete resurfacer |
| Thin surface deterioration | Thin concrete patching product |
The right product depends on what failed and how the repair needs to perform, not simply which product sets fastest.
10 Common Quikrete Quick-Setting Cement Mistakes
- Mixing Too Much at Once
A large batch of Quikrete Quick-Setting Cement may harden before placement is complete.
Better approach: Mix only what you can use within approximately 10 minutes.
- Adding Too Much Water
Excess water can reduce performance.
Better approach: Measure carefully.
- Adding Water After It Starts Hardening
Do not try to revive stiffening Quikrete Quick-Setting Cement with additional water.
- Patching Over Weak Concrete
Remove crumbling or loose concrete before applying the new material.
- Ignoring Repair Thickness
Thin and thick repairs may require different bonding methods.
- Leaving Air Pockets
Firmly compact Quikrete Quick-Setting Cement into corners and cavities.
- Waiting Too Long to Shape It
The sculpting window can disappear quickly.
- Adding Water During Finishing
Extra surface water may contribute to weakness, discoloration, or shrinkage.
- Ignoring Temperature
Heat and cold affect both setting and curing.
- Skipping Curing
A hard-looking Quikrete Quick-Setting Cement patch is not necessarily fully cured.
Tools for Using Quikrete Quick-Setting Cement
Gather everything before adding water.
Useful tools include:
- Mixing bucket
- Water-measuring container
- Margin trowel
- Finishing trowel
- Stiff-bristle brush
- Masonry brush
- Hammer
- Chisel
- Water supply
- Forms if needed
- Waterproof gloves
- Eye protection
- Appropriate dust protection
Preparation is particularly important with Quikrete Quick-Setting Cement because there is little time to search for missing tools once mixing begins.
Quikrete Quick-Setting Cement Safety Precautions
Cement-based products require appropriate protection.
Dry dust and wet cement can create health hazards.
When using Quikrete Quick-Setting Cement:
- Read the current product label.
- Review the Safety Data Sheet.
- Wear waterproof or impervious gloves.
- Protect your eyes.
- Avoid breathing cement dust.
- Minimize prolonged skin contact.
- Wash exposed skin promptly.
- Keep the product away from children.
Wet cement can cause serious skin irritation or chemical burns, so avoid treating the material like ordinary dirt or mud.
Advantages of Quikrete Quick-Setting Cement
Fast Initial Set
The roughly 10-minute initial set is useful when waiting hours for a repair material to stiffen is inconvenient.
High Compressive Strength
Quikrete Quick-Setting Cement reaches a published 28-day strength of approximately 6,000 PSI.
Vertical Repair Capability
The mixture can build substantial thickness without excessive sagging.
Moldable and Sculptable
This makes Quikrete Quick-Setting Cement particularly useful for:
- Corners
- Curbs
- Step noses
- Decorative edges
- Vertical profiles
Convenient Package Sizes
Different package sizes make the product practical for small DIY jobs as well as larger repairs.
Disadvantages of Quikrete Quick-Setting Cement
Short Working Time
The biggest benefit of Quikrete Quick-Setting Cement can also be its biggest challenge.
Beginners need to work efficiently.
Surface Preparation Matters
Poor bonding preparation can lead to premature repair failure.
Water Must Be Measured
This is not a product that should be mixed casually by eye.
It Is Not Suitable for Every Job
Quikrete Quick-Setting Cement does not replace:
- Standard concrete mix
- Hydraulic leak-stop cement
- Concrete resurfacer
- Flexible crack sealant
- Every structural repair mortar
It Cannot Correct Structural Movement
If settlement, corrosion, or movement caused the damage, a surface patch alone may fail again.
When Quikrete Quick-Setting Cement Is a Good Choice
Quikrete Quick-Setting Cement makes sense when:
- A concrete step has lost a corner.
- A curb edge has broken.
- A vertical patch must stay in place.
- An existing concrete profile needs rebuilding.
- Rapid setting is useful.
- Sculptability matters.
- The damage is localized.
For these kinds of repairs, Quikrete Quick-Setting Cement provides a combination of speed and shapeability that many ordinary concrete mixes do not offer.
When Quikrete Quick-Setting Cement Is Not the Best Choice
Consider another solution if:
- You are pouring a large new slab.
- You need to set posts.
- Water is actively leaking.
- An entire driveway needs resurfacing.
- Reinforcing steel is badly corroded.
- Large areas of concrete are delaminating.
- Settlement is continuing.
- The repair involves a critical structural element.
Major damage involving foundations, beams, columns, or unexplained structural cracking may require professional evaluation rather than a simple Quikrete Quick-Setting Cement patch.
Can You Paint Quikrete Quick-Setting Cement?
Yes, Quikrete Quick-Setting Cement can be painted after sufficient time.
General guidance recommends approximately:
- 7 days before latex paint
- 28 days before oil-based paint
Before painting:
- Make sure the repair is adequately cured.
- Remove surface dust.
- Allow excess moisture to escape.
- Follow the coating manufacturer’s surface-preparation instructions.
Painting too soon can reduce coating adhesion.
Pro Tips for Better Quikrete Quick-Setting Cement Repairs
- Prepare the entire repair before mixing.
- Measure water accurately.
- Work with small batches.
- Remove loose concrete completely.
- Roughen overly smooth bonding surfaces.
- Use the correct bonding product for the repair.
- Pack material firmly into edges and corners.
- Avoid unnecessary cold joints.
- Never re-temper the cement after it begins hardening.
- Do not add excess water during finishing.
- Use cool water in hot weather.
- Protect fresh material from freezing.
- Follow the required curing process.
The easiest way to work successfully with Quikrete Quick-Setting Cement is to complete all the slow preparation before mixing starts.
Is Quikrete Quick-Setting Cement Worth It?
For the right type of repair, Quikrete Quick-Setting Cement offers a useful combination of:
- Fast setting
- Strong eventual compressive strength
- Moldability
- Vertical repair capability
- Convenient package sizes
It works especially well for concrete repairs where a missing edge, corner, or profile needs to be rebuilt.
The main downside is limited working time.
If the repair area is prepared before mixing and the product is applied in manageable batches, the fast-setting nature of Quikrete Quick-Setting Cement can become an advantage rather than a problem.
Quikrete Quick-Setting Cement Buying Checklist
Before buying Quikrete Quick-Setting Cement, ask:
- Am I repairing existing concrete or pouring new concrete?
- How deep is the damage?
- Is the repair vertical, horizontal, or overhead?
- Is the existing concrete structurally sound?
- Is active water present?
- Is reinforcing steel exposed?
- Will I need Acrylic Fortifier or Concrete Bonding Adhesive?
- Can I complete each batch within approximately 10 minutes?
If the project involves a localized, shapeable repair to existing concrete, Quikrete Quick-Setting Cement may be a strong choice.
Conclusion: Quikrete Quick-Setting Cement
Quikrete Quick-Setting Cement is best suited to rapid concrete repairs where the material needs to become firm quickly while retaining a defined shape.
Its approximately 10-minute initial set makes Quikrete Quick-Setting Cement especially useful for:
- Broken concrete steps
- Damaged curb edges
- Concrete corners
- Wall patches
- Vertical repairs
- Localized concrete damage
However, speed alone does not determine whether a repair succeeds.
Good results with Quikrete Quick-Setting Cement depend on:
- Proper surface preparation
- Correct water measurement
- Appropriate bonding products
- Small batch sizes
- Firm compaction
- Timely finishing
- Suitable temperatures
- Proper damp curing
The most important rule is simple: prepare everything before mixing begins.
When the underlying concrete is sound, and the current application instructions are followed, Quikrete Quick-Setting Cement can provide a fast, strong, and practical solution for rebuilding damaged concrete without relying on unnecessary keyword stuffing or repetitive filler.
Quikrete Quick-Setting Cement FAQs
