


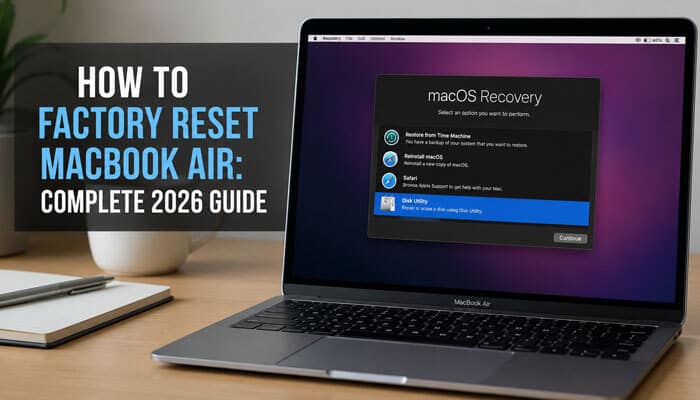

Knowing how to factory reset a MacBook Air correctly is important when you plan to sell, trade in, give away or troubleshoot the computer. People searching How to Factory Reset MacBook Air usually need one of three solutions: Erase All Content and Settings, macOS Recovery or a remote erase through Find My.
A proper reset removes your personal files, applications, user accounts and settings, allowing you to start fresh or transfer the Mac to a new owner safely. The correct process depends on the MacBook Air’s processor, security hardware and installed macOS version. Most newer models with Apple silicon can use Erase All Content and Settings. Intel-based MacBook Air models with the Apple T2 Security Chip may also support this feature. Older Intel models generally need to be erased through macOS Recovery and Disk Utility.
This guide explains every major reset method, including Apple silicon and Intel procedures, forgotten passwords, iCloud data, Activation Lock, remote erasure, macOS reinstallation, Time Machine restoration and advanced firmware recovery.
Quick Answer: How to Factory Reset MacBook Air
For a supported MacBook Air running macOS Ventura 13 or later:
- Open the Apple menu.
- Select System Settings.
- Click General.
- Choose Transfer or Reset.
- Click Erase All Content and Settings.
- Enter the administrator password used to log in to the Mac.
- Review the accounts, settings, and data that will be removed.
- Enter your Apple Account password if requested.
- Confirm Erase All Content & Settings.
- Allow the Mac to restart, activate, and display Setup Assistant.
Erase All Content and Settings is available only on a Mac with Apple silicon or the Apple T2 Security Chip running macOS Monterey 12 or later. It removes user data, settings, and installed applications while maintaining the currently installed operating system.
If the option is missing or does not work, start the MacBook Air in macOS Recovery, erase Macintosh HD with Disk Utility, and reinstall macOS.
Key Takeaways
- Back up important files before erasing the Mac.
- Use Erase All Content and Settings whenever it is supported.
- Apple silicon and Intel MacBook Air models use different Recovery startup procedures.
- Resetting the Mac does not normally delete information already stored in iCloud.
- Reinstalling macOS without erasing the startup disk is not a complete factory reset.
- A factory reset cannot legitimately bypass Activation Lock.
- Managed work or school Macs may reconnect to organizational management after being erased.
- When selling the Mac, stop at Setup Assistant and allow the buyer to complete the setup.
- Use DFU firmware recovery only when ordinary Recovery and installation methods fail.
What Does a Factory Reset Do to a MacBook Air?
A factory reset removes information and configurations associated with the current owner. The precise result depends on the method used.
A complete reset can remove:
- User accounts
- Login passwords
- Downloaded applications
- Application data and preferences
- Documents and downloads
- Files stored on the Desktop
- Locally stored photos and videos
- Browser history and saved sessions
- Saved Wi-Fi networks
- Touch ID fingerprints
- Apple Pay information
- Bluetooth pairings
- Privacy permissions
- System preferences
- Local email data
- Apple Account connections
- Find My associations
- Additional internal volumes
Erase Assistant signs you out of Apple services, turns off Find My and Activation Lock, removes installed applications and deletes local user accounts and their data. It retains the operating system, so macOS normally does not need to be downloaded again.
When Disk Utility is used instead, the startup volume is erased manually. You must reinstall macOS before the computer can start normally.
Does a Factory Reset Delete iCloud Data?
A factory reset removes data stored locally on the MacBook Air. It does not automatically delete information already stored in your iCloud account.
Depending on your settings, synchronized information may include:
- iCloud Drive files
- iCloud Photos
- Contacts
- Calendars
- Notes
- Reminders
- Safari bookmarks
- Passwords and passkeys
- Messages in iCloud
- iCloud Mail
When you sign out of iCloud before a manual reset, macOS may ask whether you want to keep a local copy of certain data. Because the computer will be erased afterward, keeping the local copy may make the sign-out process faster.
Before resetting:
- Connect the MacBook Air to the internet.
- Open Photos, iCloud Drive and other important applications.
- Wait for pending uploads or synchronization to finish.
- Confirm important files on another device or through iCloud.
- Create a separate backup of irreplaceable information.
Do not manually delete synchronized files merely because you intend to reset the Mac. Deleting an item from a synchronized service may also remove it from your other connected devices.
Is a Factory Reset Secure Enough Before Selling?
For supported MacBook Air models, Erase All Content and Settings is Apple’s recommended method for quickly and securely removing personal information, applications and settings.
You generally do not need to:
- Perform several identical resets
- Fill the internal storage with random files
- Install third-party disk-wiping applications
- Repeatedly overwrite the internal SSD
- Purchase a separate “military-grade” erasure tool
For the strongest privacy protection before selling:
- Create and verify a backup.
- Use Erase All Content and Settings when available.
- Confirm Find My and Activation Lock have been removed.
- Stop when Setup Assistant appears.
- Shut down the Mac without creating another account.
- Keep your backup drive and any accessories you are not selling.
How to Factory Reset MacBook Air: Choose the Right Method
Use this table to identify the correct method quickly. The right How to Factory Reset MacBook Air procedure depends mainly on the processor, security chip, and installed macOS version.
| MacBook Air configuration | Recommended method |
| Apple silicon with macOS Monterey 12 or later | Erase All Content and Settings |
| Intel MacBook Air with T2 chip and macOS Monterey 12 or later | Erase All Content and Settings |
| Intel MacBook Air without a T2 chip | macOS Recovery and Disk Utility |
| Mac running macOS Big Sur 11 or earlier | Update macOS or use Recovery |
| Mac that cannot start normally | macOS Recovery and Disk Utility |
| Mac with a forgotten login password | Password Recovery or Recovery Assistant |
| Lost Mac with Find My enabled | Remote erase through Find My |
| Mac with damaged firmware | DFU revive or restore |
Erase All Content and Settings should be your first choice when available because it is simpler and reduces the risk of selecting the wrong disk, volume or format. The feature is limited to Apple silicon and T2-equipped Macs running macOS Monterey 12 or later.
How to Identify Your MacBook Air
Before choosing a method, determine whether the MacBook Air uses Apple silicon or an Intel processor.
Check for Apple Silicon or Intel
- Open the Apple menu.
- Select About This Mac.
- Look for Chip or Processor.
The result indicates:
- Chip: The Mac uses Apple silicon.
- Processor: The Mac uses an Intel processor.
Check Whether an Intel Mac Has the T2 Chip
Intel MacBook Air models introduced from 2018 through 2020 contain the Apple T2 Security Chip, excluding the M1 MacBook Air introduced in 2020 because that model uses Apple silicon.
To verify the chip:
- Hold the Option key.
- Open the Apple menu.
- Select System Information.
- Choose Controller or iBridge in the sidebar.
- Look for Apple T2 chip.
If the T2 chip appears, the computer may support Erase All Content and Settings when macOS Monterey 12 or later is installed.
Check the Installed macOS Version
- Open the Apple menu.
- Choose About This Mac.
- Read the macOS name and version number.
You need this information because the location and availability of Erase Assistant depend on the installed operating system.
Before You Begin: How to Factory Reset MacBook Air Safely
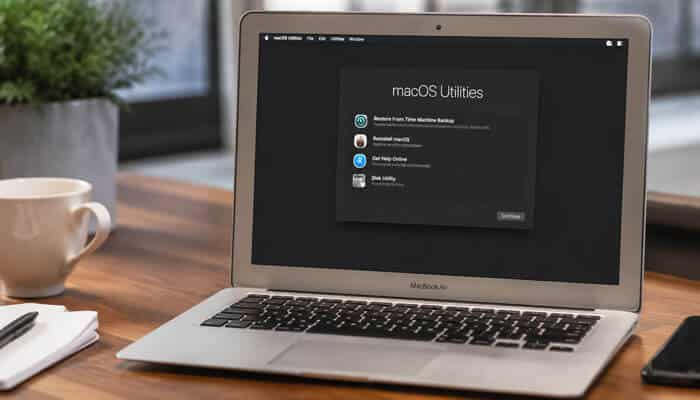
Complete the following checks before erasing anything.
1. Create a Time Machine Backup
Time Machine is Apple’s built-in backup feature. It can back up applications, music, photos, email, documents and other files to a compatible external storage device.
To create a backup:
- Connect a compatible external storage device.
- Open the Apple menu.
- Select System Settings.
- Click General.
- Choose Time Machine.
- Click Add Backup Disk.
- Select the external drive.
- Click Set Up Disk.
- Open the Time Machine menu.
- Select Back Up Now.
Do not assume a backup is usable merely because the external drive is connected. Confirm that the backup completed and check that essential files are available.
2. Copy Critical Files Separately
Irreplaceable information may deserve a second copy.
Consider separately saving:
- Business documents
- Tax and financial records
- Family photos and videos
- Password exports
- Software license details
- Browser bookmarks
- Local email archives
- Creative projects
- Work files that are not synchronized
- Cryptocurrency recovery information
Store the second copy on another external drive or a trusted cloud-storage service.
3. Confirm Your Passwords
Several different credentials may be required.
| Credential | Purpose |
| Mac login password | Opens the administrator account and Erase Assistant |
| Apple Account password | Signs out of services and removes Activation Lock |
| FileVault recovery key | May help reset a forgotten login password |
| Intel firmware password | May be required to start Recovery |
| Wi-Fi password | Connects the Mac during activation or reinstallation |
A Mac login password and Apple Account password are not necessarily the same.
4. Connect the Charger
Keep the MacBook Air connected to power while:
- Erasing the computer
- Activating the Mac
- Installing macOS
- Restoring a Time Machine backup
- Using Migration Assistant
- Reviving or restoring firmware
Do not deliberately shut down the computer or close the lid during macOS installation.
5. Use a Reliable Internet Connection
Internet access may be required to:
- Activate the erased Mac
- Download macOS
- Start Internet Recovery
- Verify the operating system
- Sign out of the Apple Account
- Remove Activation Lock
Avoid public networks that require a browser-based login page while using macOS Recovery.
6. Check Repair Assistant on macOS Tahoe 26
This optional check applies to a MacBook Air with Apple silicon running macOS Tahoe 26 or later that was previously repaired—or may have an unfinished repair.
- Open System Settings.
- Select General.
- Click About.
- Look for Parts & Service.
- If Finish Repair or a similar repair-completion option appears, follow the Repair Assistant instructions.
Repair Assistant retrieves calibration information and completes eligible repairs. Parts & Service appears only when the Mac detects relevant repair history.
7. Check Boot Camp on an Intel Mac
If Windows was installed through Boot Camp, Erase Assistant may report that other volumes must be removed first.
When this happens, use Boot Camp Assistant to remove Windows and its partition before attempting Erase All Content and Settings again. Do not manually delete the Windows partition with Disk Utility unless Apple’s instructions for your specific situation require it.
8. Check Whether the Mac Is Managed
A company or school Mac may be enrolled in device management.
Warning signs include:
- “Remote Management” during Setup Assistant
- A company or school name on the login screen
- Device-management profiles in System Settings
- Restricted account or privacy settings
- Applications that reinstall automatically
- Erase All Content and Settings being disabled
Erasing the computer does not necessarily remove organizational ownership. A managed Mac may reconnect to its organization during Setup Assistant.
Contact the employer, school or device administrator before resetting a managed Mac.
9. Check for an Intel Firmware Password
An Intel Mac may have a firmware password that prevents startup from macOS Recovery or another storage device. It may also be requested when using Erase All Content and Settings on a T2-equipped Intel Mac.
Apple-silicon Macs do not use the same Intel firmware-password feature.
To turn off a known firmware password:
- Start the Intel Mac in macOS Recovery.
- Enter the firmware password.
- Open Utilities.
- Select Startup Security Utility or Firmware Password Utility.
- Choose Turn Off Firmware Password.
- Enter the password again.
- Restart the Mac.
When the password is forgotten, Apple may require valid proof of purchase before providing assistance.
Method 1: How to Factory Reset MacBook Air With Erase All Content and Settings
This is the preferred method for:
- Apple-silicon MacBook Air models
- Intel MacBook Air models with the T2 Security Chip
- Supported models running macOS Monterey 12 or later
Steps for macOS Ventura 13 or Later
- Open the Apple menu.
- Select System Settings.
- Click General in the sidebar.
- Select Transfer or Reset.
- Click Erase All Content and Settings.
- Enter the administrator password used to log in to the Mac.
- Review the settings, media, accounts and data that will be removed.
- Create a Time Machine backup if offered and still needed.
- Click Continue.
- Enter your Apple Account password if requested.
- Select Erase All Content & Settings.
- Allow the MacBook Air to restart.
- Connect to Wi-Fi if requested.
- Wait for the Mac to activate and restart again.
These steps apply to macOS Ventura and later, including macOS Tahoe 26.
Steps for macOS Monterey 12
- Open the Apple menu.
- Choose System Preferences.
- Click System Preferences in the top menu bar.
- Select Erase All Content and Settings.
- Enter the administrator password.
- Review the items being removed.
- Enter the Apple Account password if requested.
- Confirm the erasure.
The Erase All Content and Settings option appears in the System Preferences menu bar on macOS Monterey.
What Erase Assistant Removes
Erase Assistant:
- Signs you out of Apple services
- Turns off Find My
- Removes Activation Lock
- Deletes installed applications
- Removes personal files and settings
- Deletes local user accounts
- Removes Touch ID information
- Removes Apple Pay information
- Erases additional internal volumes
- Maintains the installed operating system
The process does not change the content or settings on your other Apple devices.
What to Do When the Reset Finishes
When keeping the Mac: Continue through Setup Assistant, connect to Wi-Fi and create a new user account.
When selling or giving it away: Do not continue through Setup Assistant. Press and hold the power or Touch ID button until the Mac shuts down. This leaves it ready for the next owner.
Method 2: How to Factory Reset MacBook Air With Apple-Silicon Recovery
Use macOS Recovery when:
- macOS does not start normally
- Erase Assistant does not open
- Erase All Content and Settings is missing
- The startup disk has errors
- A manual erase is required
Step 1: Start macOS Recovery
- Shut down the MacBook Air.
- Press and continue holding the power or Touch ID button.
- Release it when Loading startup options appears.
- Select Options.
- Click Continue.
- Select Macintosh HD if requested.
- Choose an administrator account.
- Enter the account password.
Apple-silicon Macs enter Recovery by holding the power button until startup options appear.
Step 2: Open Disk Utility
- Select Disk Utility.
- Click Continue.
- Find Macintosh HD under the Internal section.
Make sure you select the internal startup volume, not an external Time Machine or backup drive.
Step 3: Erase Macintosh HD
- Select Macintosh HD.
- Click Erase.
- Enter the following details:
| Disk Utility field | Selection |
| Name | Macintosh HD |
| Format | APFS |
- Click Erase Volume Group if available.
- Otherwise, click Erase.
- Enter your Apple Account information if requested.
- Select Erase Mac and Restart if prompted.
APFS is the correct format when manually erasing the startup volume of a Mac with Apple silicon.
Step 4: Activate the Mac
After restarting:
- Select a language.
- Connect to Wi-Fi.
- Wait for the Mac to activate.
- Enter the associated Apple Account information if requested.
- Select Exit to Recovery Utilities.
An internet connection is required for activation.
Step 5: Reinstall macOS
- Select Reinstall macOS.
- Click Continue.
- Accept the software license agreement.
- Select Macintosh HD.
- Begin the installation.
- Keep the Mac connected to power and the internet.
- Allow it to restart when necessary.
The screen may temporarily go blank, and the Mac may restart several times. Do not close the lid or interrupt the installation.
Method 3: How to Factory Reset MacBook Air With Intel Recovery
Older Intel models that cannot use Erase Assistant require a manual process.
Step 1: Sign Out of Apple Services
These steps are particularly important when selling or giving away the computer.
Sign Out of iCloud
On macOS Ventura or later:
- Open System Settings.
- Click your name.
- Scroll down.
- Select Sign Out.
On Monterey, Big Sur or Catalina:
- Open System Preferences.
- Select Apple ID.
- Click Overview.
- Select Sign Out.
Sign Out of iMessage
- Open Messages.
- Select Messages > Settings or Preferences.
- Click iMessage.
- Select Sign Out.
Deauthorize iTunes on Older macOS Versions
This applies only to macOS versions earlier than Catalina:
- Open iTunes.
- Select Account.
- Choose Authorizations.
- Click Deauthorize This Computer.
- Enter your Apple Account information.
These manual sign-out steps are important when Erase All Content and Settings cannot be used.
Step 2: Start Intel macOS Recovery
- Shut down the MacBook Air.
- Press and release the power button.
- Immediately hold Command-R.
- Continue holding the keys until an Apple logo or spinning globe appears.
- Select a network if requested.
- Choose an administrator account.
- Enter its password.
Use the built-in keyboard when possible because an external or wireless keyboard may not connect quickly enough during startup.
Intel Recovery Key Combinations
| Key combination | Purpose |
| Command-R | Starts built-in Recovery and offers the most recently installed macOS |
| Option-Command-R | Starts Internet Recovery and may offer the latest compatible macOS |
| Shift-Option-Command-R | May offer the original macOS or the closest available version |
The macOS version offered through Recovery depends on the startup key combination used.
Step 3: Erase Macintosh HD
- Select Disk Utility.
- Click Continue.
- Choose View > Show All Devices if necessary.
- Select Macintosh HD.
- Click Erase.
- Enter Macintosh HD as the name.
- Select APFS or Mac OS Extended (Journaled) as recommended by Disk Utility.
- Click Erase Volume Group if available.
- Otherwise, click Erase.
- Close Disk Utility when the process finishes.
The startup disk must be erased from macOS Recovery or another startup disk. Use the format recommended by Disk Utility for the installed system and hardware.
Step 4: Reinstall macOS
- Return to the Recovery utilities window.
- Select Reinstall macOS.
- Click Continue.
- Choose Macintosh HD.
- Follow the installer.
- Keep the computer connected to power and the internet.
When Setup Assistant appears:
- Continue the setup when you are keeping the computer.
- Press Command-Q and shut down when transferring it to another person.
Step 5: Reset NVRAM Before Selling an Intel Mac
Resetting NVRAM after the manual erase-and-reinstall process clears certain user settings from memory and restores some security-related settings.
After the Mac returns to Setup Assistant, press Command-Q again to shut it down.
An NVRAM reset alone does not erase applications, user accounts or personal files.
How to Factory Reset MacBook Air Without a Password
The correct solution depends on which password you have forgotten.
Forgotten Mac Login Password
Try password recovery before erasing the entire computer.
- Enter an incorrect password up to three times.
- Click the question mark beside the password field if it appears.
- Look for an option such as:
- Restart and show password-reset options
- Reset using your recovery key
- Reset using your Apple Account
- Follow the onscreen instructions.
- Create a new login password.
You may be asked for your Apple Account credentials, a verification code, a FileVault recovery key or another administrator account.
Reset the Password Through Recovery
If no reset option appears at the login window:
- Start macOS Recovery.
- Select Forgot all passwords?
- Follow the onscreen instructions.
- Enter Apple Account or FileVault information if requested.
- Create a new password.
- Restart the Mac.
When the normal Recovery options do not work:
- Open Terminal from the Recovery Utilities menu.
- Enter resetpassword.
- Press Return.
- Select the appropriate reset option.
- Follow the onscreen instructions.
Find a FileVault Recovery Key in macOS Tahoe 26
On a Mac using macOS Tahoe 26 or later, the FileVault recovery key may be available in the Passwords app on another Apple device signed in to the same Apple Account.
Search for the name of the affected Mac or for its recovery key in Passwords.
Erase the Mac When Password Recovery Fails
When the login password cannot be recovered:
- Start macOS Recovery.
- Open Recovery Assistant from the top menu.
- Select Erase Mac if available.
- Confirm the erasure.
- Allow the computer to restart.
- Connect to Wi-Fi.
- Enter Apple Account information if Activation Lock appears.
- Return to Recovery.
- Reinstall macOS.
This permanently removes local accounts, passwords and files.
Can a Factory Reset Bypass Activation Lock?
No.
Activation Lock remains associated with the Apple Account used with Find My. The previous owner must enter the connected account credentials or remove the Mac from Find My before another person can activate it.
Do not buy a used MacBook Air that remains locked to another person’s Apple Account.
How to Factory Reset MacBook Air Remotely With Find My
A Mac can be erased remotely only if Find My was enabled before the computer was lost.
Remotely Erase the Mac
- Open Find My on another Apple device or Find Devices through iCloud.
- Select Devices.
- Choose the missing MacBook Air.
- Select Erase This Device or Erase Mac.
- Add a phone number or message if requested.
- Enter your Apple Account password.
- Confirm the erase request.
If the Mac is offline, the request begins the next time it connects to a network. If you recover an offline Mac before erasure begins, you may be able to cancel the request.
Keep a Lost Mac in Find My
Remote erasure and removing a device from Find My are different actions.
After remote erasure:
- Personal information and settings are deleted.
- Activation Lock remains enabled.
- Your Apple Account is required to reactivate the Mac.
- Removing the device from Find My disables Activation Lock.
Activation Lock remains enabled after remote erasure to protect lost or stolen devices.
| Situation | Correct action |
| Mac is lost or stolen | Erase it remotely but keep it in Find My |
| Mac was sold or given away | Erase it and remove it from Find My |
| Offline erase is pending and the Mac is recovered | Cancel the erase request |
| Mac is being serviced | Follow Apple’s service instructions |
Do not remove a stolen Mac from Find My merely to clear it from your device list.
How to Factory Reset MacBook Air Before Selling or Trading In
When the goal is to sell or trade in the computer, following the correct How to Factory Reset MacBook Air process protects your information and prevents setup problems for the next owner.
Use this checklist before transferring ownership:
- Create a current backup.
- Confirm important files can be opened from the backup.
- Check for an unfinished repair on an eligible Apple-silicon Mac.
- Use Erase All Content and Settings when supported.
- Sign out manually when Erase Assistant is unavailable.
- Remove Windows with Boot Camp Assistant if required.
- Erase Macintosh HD when using Recovery.
- Reinstall macOS after a manual erase.
- Reset NVRAM on an Intel Mac.
- Confirm Activation Lock is removed.
- Stop at Setup Assistant.
- Do not create an account for the buyer.
- Rename or unpair Bluetooth accessories when appropriate.
- Record the serial number and transaction details.
- Review whether an AppleCare plan should be transferred or cancelled.
Remove Activation Lock From a Mac You Already Sold
When the Mac is no longer in your possession:
- Open Find Devices through iCloud.
- Select the MacBook Air.
- Erase it if it has not already been erased.
- Wait for the erasure to complete.
- Select Remove This Device.
Removing the device disables Activation Lock and allows the new owner to activate it with a different Apple Account. Use this method only when you intentionally sold, traded in or gave away the computer.
How to Restore Files After a MacBook Air Factory Reset
A Time Machine backup can be restored through Setup Assistant or Migration Assistant.
Restore During Initial Setup
When Setup Assistant asks how you want to transfer your information:
- Connect the Time Machine backup drive.
- Select the option to transfer from a Mac, Time Machine backup or startup disk.
- Choose the backup drive.
- Select the required backup date.
- Choose the information to restore.
- Continue through setup.
You may be able to restore:
- User accounts
- Applications
- Documents
- Desktop files
- Photos
- Music
- System settings
- Personal folders
Restore After Completing Setup
- Connect the Time Machine drive.
- Open Migration Assistant.
- Find it in Applications > Utilities, or open it through Transfer or Reset settings.
- Enter the administrator password.
- Select From a Mac, Time Machine or startup disk.
- Choose the backup drive.
- Select the desired backup.
- Choose the applications, accounts, files and settings to transfer.
- Click Continue.
Migration Assistant can restore personal files, applications and the contents of backed-up user accounts. You can also select individual categories instead of restoring everything.
When to Restore Only Selected Files
Avoid restoring every application and setting when the reset was performed because of:
- Corrupted preferences
- Unwanted applications
- Suspicious browser extensions
- Persistent software conflicts
- Excessive system clutter
- A suspected malware infection
A selective restoration reduces the risk of returning the same problem to the freshly reset Mac.
How to Fix Problems When You Factory Reset MacBook Air
The following fixes cover the most common issues readers encounter while following How to Factory Reset MacBook Air instructions.
Erase All Content and Settings Is Missing
Possible causes include:
- The Mac does not have Apple silicon or a T2 chip.
- The Mac is running macOS Big Sur 11 or earlier.
- The current account is not an administrator.
- macOS is damaged.
- The Mac was started from an external disk.
- Organizational management has restricted the feature.
When the option is unsupported or does not work, use macOS Recovery and Disk Utility.
Erase Assistant Reports Other Volumes
This message may appear when Windows was installed through Boot Camp.
Open Boot Camp Assistant and remove Windows and its partition before attempting Erase All Content and Settings again.
Command-R Does Not Open Recovery
Remember:
- Apple silicon: Hold the power button until startup options appear.
- Intel: Turn on the Mac and immediately hold Command-R.
On an Intel Mac, also try:
- Using the built-in keyboard
- Option-Command-R
- Shift-Option-Command-R
- A wired keyboard
- Another internet connection
- Entering or disabling a known firmware password
Use the built-in keyboard on a Mac laptop when startup key combinations are not being recognized.
Macintosh HD Does Not Appear
- Shut down the Mac.
- Disconnect nonessential accessories.
- Start macOS Recovery again.
- Open Disk Utility.
- Select View > Show All Devices.
- Check the Internal section.
If the internal storage still does not appear, the computer may require hardware service.
Erase Volume Group Is Unavailable
Select Macintosh HD rather than only Macintosh HD – Data.
If Erase Volume Group does not appear, click Erase and follow the instructions shown by Disk Utility.
macOS Cannot Be Reinstalled
Check that:
- The Mac is connected to power.
- Wi-Fi is working.
- The network does not require a browser login.
- Macintosh HD appears in Disk Utility.
- The correct destination volume is selected.
- The Mac supports the offered macOS version.
- Unnecessary external devices are disconnected.
- Mac activation has completed.
Persistent installation problems on Apple-silicon or T2-equipped Macs may rarely require a firmware revive or restore.
Activation Lock Appears
Enter the Apple Account previously associated with Find My on that Mac.
If the Mac belongs to another person, the previous owner must remove it from their Apple Account. Erasing Macintosh HD does not bypass Activation Lock.
A Flashing Question-Mark Folder Appears
A flashing question mark means that the startup disk is unavailable or does not contain a working operating system.
Start macOS Recovery, check the disk with Disk Utility, and reinstall macOS.
Setup Assistant Appears
This is normal. Setup Assistant indicates that the Mac has reached the new-user configuration stage.
When selling the computer, shut it down without creating a user account.
Remote Management Appears
The Mac may still be enrolled by a business or school.
Contact the organization or seller. A standard factory reset does not remove legitimate organizational enrollment.
Run Apple Diagnostics Before Erasing
A factory reset cannot repair failing hardware. Consider running Apple Diagnostics before erasing when the Mac has:
- Unexpected shutdowns
- Charging problems
- Battery warnings
- Display faults
- Keyboard or trackpad problems
- Repeated crashes
- Storage errors
- Unexplained overheating
Apple-Silicon MacBook Air
- Shut down the Mac.
- Disconnect nonessential accessories.
- Hold the power button.
- Release it when startup options appear.
- Hold Command-D.
- Follow the diagnostic instructions.
Intel MacBook Air
- Shut down the Mac.
- Turn it on.
- Immediately hold D.
- Try Option-D if D does not work.
- Release the keys when prompted.
- Follow the instructions.
Record any diagnostic reference code before erasing the computer or arranging service.
How to Revive or Restore MacBook Air Firmware With DFU Mode
DFU recovery is an advanced option for rare problems affecting a MacBook Air with Apple silicon or the T2 Security Chip.
It may be appropriate when the Mac:
- Starts with an exclamation mark in a circle
- Starts with a persistent blank screen
- Cannot enter Recovery
- Fails repeatedly during macOS installation
- Develops a firmware problem after an interrupted update
You need:
- The affected MacBook Air
- Another Mac running macOS 14 or later
- Internet access on the host Mac
- Sufficient free storage on the host Mac
- A USB-C cable that supports data and charging
- Both computers connected to power
Use the correct DFU port and do not use a Thunderbolt 3 cable for this procedure.
Revive vs. Restore
| DFU action | Deletes personal data? | Purpose |
| Revive Mac | No | Repairs firmware and Recovery software |
| Restore Mac | Yes | Erases the Mac and restores firmware |
Always try Revive Mac first because it does not erase the affected computer. Use Restore Mac only when reviving fails or complete firmware-level erasure is necessary.
Basic DFU Process
Advanced procedure: Confirm the correct DFU port and model-specific instructions before starting.
- Connect the USB-C data cable to the correct DFU port on the affected Mac.
- Connect the other end to the host Mac.
- Keep both computers connected to power.
- Shut down the affected Mac.
- Press and release its power button.
- Immediately hold:
- Left Control
- Left Option
- Right Shift
- Power button
- On Apple silicon, hold all four keys for about 10 seconds, then release every key except the power button.
- Continue holding the power button until the host Mac displays the DFU window in Finder.
- On a T2-equipped Intel laptop, hold all four keys for about three seconds or until the DFU window appears.
- Choose Revive Mac first.
- If revival fails, choose Restore Mac and confirm the restoration.
DFU timing and port selection are critical. Follow the model-specific instructions or contact Apple Support when the Mac does not appear in Finder.
Factory Reset vs. Reinstalling macOS
These actions are related but not identical.
| Action | Deletes personal data? | Reinstalls macOS? | Best use |
| Restart | No | No | Temporary software problems |
| Safe Mode | No | No | Isolating startup software |
| Apple Diagnostics | No | No | Checking hardware |
| Reinstall macOS without erasing | Usually no | Yes | Repairing system files |
| Erase All Content and Settings | Yes | Keeps installed macOS | Selling or starting fresh |
| Disk Utility erase | Yes | Required afterward | Older or inaccessible Macs |
| Time Machine restoration | Replaces selected data | Restores backup content | Recovering a previous setup |
| DFU revive | No | Repairs firmware | Serious firmware problems |
| DFU restore | Yes | Restores firmware | Failed revival or major corruption |
Reinstalling macOS through Recovery does not normally remove applications or personal information when the startup disk has not first been erased. Therefore, reinstalling macOS alone is not a complete factory reset.
Which macOS Version Will Be Installed?
The version offered depends on the Mac and the Recovery method.
Apple-Silicon MacBook Air
Recovery generally offers an available version associated with the Mac’s most recently installed operating system.
Intel MacBook Air
| Recovery method | Likely macOS version |
| Command-R | Most recently installed macOS |
| Option-Command-R | Latest macOS compatible with the Mac |
| Shift-Option-Command-R | Original macOS or closest available version |
Erasing an older Intel Mac does not make it compatible with a macOS release that its hardware does not support. The offered installer depends on the Recovery key combination and device compatibility.
When Should You Factory Reset a MacBook Air?
A factory reset may be appropriate when:
- Selling the Mac
- Trading it in
- Giving it to another person
- Removing personal information
- Starting with a clean configuration
- Returning an authorized work device
- Recovering from severe software corruption
- Removing persistent unwanted software
- Rebuilding the system after an account compromise
- Regaining access when password recovery fails
A factory reset should not normally be the first response to a minor issue.
Try these steps first:
- Restart the Mac.
- Install macOS and application updates.
- Remove recently installed software.
- Free up storage space.
- Start in Safe Mode.
- Run Disk Utility First Aid.
- Run Apple Diagnostics.
- Reinstall macOS without erasing.
Safe Mode can help determine whether startup-loaded software is contributing to a problem.
What a Factory Reset May Not Fix
A factory reset may not repair:
- A worn or swollen battery
- Liquid damage
- A cracked display
- Keyboard or trackpad failure
- Defective internal storage
- Logic-board problems
- Charging-port damage
- A faulty charger or cable
- Hardware overheating
- Activation Lock
- Organizational management
- A forgotten Intel firmware password
- Physical Wi-Fi or Bluetooth faults
When Disk Utility cannot detect the internal storage, Apple Diagnostics returns a hardware reference code or macOS repeatedly fails during installation, professional service may be necessary.
Final Factory-Reset Checklist
Before considering the process complete, confirm that:
- Important files are backed up.
- The backup completed successfully.
- Recent iCloud changes have synchronized.
- Repair Assistant has completed any eligible unfinished repair.
- Personal user accounts are no longer visible.
- Find My has been handled correctly.
- Activation Lock is removed when transferring ownership.
- Activation Lock remains enabled when the Mac is lost or stolen.
- macOS is installed, or Setup Assistant appears.
- No account was created for the buyer.
- The Mac can connect to Wi-Fi and activate.
- External backup drives have been disconnected.
- Boot Camp volumes have been handled correctly.
- Managed-device ownership has been resolved.
- Diagnostic reference codes have been recorded.
- NVRAM has been reset on an Intel Mac being prepared for sale.
Final Verdict: How to Factory Reset MacBook Air
Learning how to Factory Reset MacBook Air begins with identifying whether the computer uses Apple silicon or an Intel processor. For most supported models running macOS Monterey 12 or later, Erase All Content and Settings is the simplest and safest method. It removes personal files, applications, user accounts and settings while maintaining the installed operating system.
Older Intel models require a longer procedure involving Apple-service sign-outs, macOS Recovery, Disk Utility, macOS reinstallation and an NVRAM reset when the computer is being prepared for a new owner. Serious startup or firmware failures may require Apple Diagnostics or a DFU revive or restore.
Whichever method you use, create a verified backup first, allow iCloud synchronization to finish and confirm that you know the Apple Account connected to the Mac. When selling or giving away the computer, remove Activation Lock and stop at Setup Assistant so the next owner can complete the setup securely.
How to factory reset MacBook Air FAQs
1. How to factory reset MacBook Air quickly?
The quickest way to factory reset a supported MacBook Air is to open Apple menu > System Settings > General > Transfer or Reset > Erase All Content and Settings. Enter the administrator password, review the information being removed and confirm the reset. This option is available on Apple-silicon Macs and T2-equipped Intel Macs running macOS Monterey 12 or later.
2. How to factory reset MacBook Air without a password?
First, try resetting the login password with your Apple Account, FileVault recovery key or macOS Recovery. If password recovery fails, Recovery Assistant may provide an Erase Mac option. This permanently deletes local accounts, passwords and files, although Activation Lock may still require the associated Apple Account.
3. Does a factory reset delete everything on a MacBook Air?
A factory reset deletes locally stored user accounts, applications, files and settings. Information already synchronized with iCloud normally remains available through your Apple Account. Always verify that synchronization has finished and create a Time Machine backup before erasing the Mac.
4. How to factory reset MacBook Air before selling it?
Back up your files, use Erase All Content and Settings when supported and confirm that Find My and Activation Lock have been removed. When Setup Assistant appears, shut down the Mac without creating another account. The new owner can then complete setup with their own Apple Account.
5. Why is Erase All Content and Settings missing on my MacBook Air?
The option may be unavailable because the Mac does not have Apple silicon or the T2 Security Chip, is running macOS Big Sur or earlier, was started from an external disk or is managed by a company or school. In these cases, use macOS Recovery and Disk Utility to erase Macintosh HD and reinstall macOS.
