

Learning how to fix shaky hands photography problems is one of the most important skills for anyone who wants clearer, sharper, and more professional-looking images. A blurry photo does not always mean you need an expensive camera or advanced equipment. In many cases, small improvements in your shooting technique, camera settings, and preparation can make a major difference.
Many photographers experience camera shake, especially when shooting in low light, using slower shutter speeds, capturing portraits with long lenses, or taking handheld photos for travel and street photography. Even a small movement of your hands while pressing the shutter button can create unwanted blur and reduce image quality.
Through practical photography experience, testing different camera settings, and understanding how light affects exposure, photographers can reduce motion blur and capture sharper images. This guide explains the causes of shaky photos and the most effective methods to improve stability, whether you use a DSLR, mirrorless camera, smartphone, or action camera.
What Causes Shaky Hands in Photography?
Before learning how to fix shaky hands photography, it is important to understand why camera shake happens. A camera records everything that happens during the exposure time. If your hands move while the shutter is open, the sensor captures that movement as blur.
Common reasons for shaky photos include:
- Using a slow shutter speed without support
- Holding the camera incorrectly
- Pressing the shutter button too hard
- Shooting in dark environments
- Using a heavy camera lens
- Poor body posture while taking photos
- Lack of image stabilization
- Fatigue or hand tension
- Incorrect camera settings
A photographer who understands these causes can choose the right solution instead of randomly changing settings.
Quick Overview: Ways to Reduce Camera Shake
| Problem | Solution |
| Slow shutter speed | Increase shutter speed |
| Unstable hand position | Improve camera grip |
| Low-light blur | Use tripod or increase ISO |
| Heavy equipment | Add support accessories |
| Lens movement | Use image stabilization |
| Shutter button vibration | Use timer or remote shutter |
| Poor posture | Maintain stable shooting position |
Use a Faster Shutter Speed
One of the easiest ways to fix shaky hands photography is adjusting your shutter speed. The shutter speed controls how long your camera sensor collects light. A longer exposure gives your hands more time to move, which creates blur.
For handheld photography, many photographers follow the basic shutter speed rule:
Shutter speed should usually be at least equal to the focal length of your lens.
Examples:
- 50mm lens → around 1/50 second or faster
- 100mm lens → around 1/100 second or faster
- 200mm lens → around 1/200 second or faster
However, this is only a starting point. If you have naturally shaky hands or are using a heavy lens, you may need a faster shutter speed.
Recommended handheld shutter speeds:
| Photography Type | Suggested Shutter Speed |
| Landscape | 1/100 sec or faster |
| Street photography | 1/250 sec or faster |
| Portrait photography | 1/125 sec or faster |
| Sports photography | 1/1000 sec or faster |
| Wildlife photography | 1/1000 sec or faster |
| Macro photography | 1/250 sec or faster |
A faster shutter speed may reduce the amount of light entering your camera, so you may need to adjust ISO or aperture.
Improve Your Camera Holding Technique
Your hands are the first support system for your camera. The way you hold your equipment directly affects image sharpness.
Many beginners hold their camera with their arms stretched forward. This creates instability because your muscles have to work harder to keep the camera still.
Use these techniques instead:
1. Support the Lens With Your Left Hand
Your left hand should support the weight of the lens from underneath. Your right hand should control the camera body and shutter button.
This creates a balanced position and reduces unnecessary movement.
2. Keep Your Elbows Close
Avoid spreading your elbows outward. Keeping them close to your body creates a natural support system.
Think of your arms as a tripod:
- Left hand supports the lens
- Right hand controls settings
- Body provides stability
3. Hold the Camera Close to Your Face
When using the viewfinder, your face becomes an additional support point. This is usually more stable than holding the camera away from your body using the screen.
Maintain Proper Body Position
Your standing position can affect camera stability more than many photographers realize.
Try these simple techniques:
Stand Like a Photographer
- Keep your feet shoulder-width apart
- Slightly bend your knees
- Keep your shoulders relaxed
- Avoid leaning forward too much
- Hold your breath briefly when pressing the shutter
A stable body creates a stable camera.
Use Objects Around You for Support
If you are shooting outdoors, use nearby objects:
- Walls
- Trees
- Tables
- Railings
- Fences
These can act as natural supports when carrying a tripod is not practical.
Enable Image Stabilization
Modern cameras and lenses often include image stabilization technology. This feature helps compensate for small hand movements while taking photos.
Different brands use different names:
| Brand | Stabilization Name |
| Canon | Image Stabilization (IS) |
| Nikon | Vibration Reduction (VR) |
| Sony | Optical SteadyShot / In-Body Stabilization |
| Fujifilm | Optical Image Stabilization (OIS) |
| Panasonic | Mega O.I.S. |
Image stabilization is especially useful for:
- Travel photography
- Indoor photography
- Portraits
- Evening shots
- Telephoto lenses
However, stabilization cannot freeze moving subjects. It mainly reduces blur caused by photographer movement.
Increase ISO When Lighting Is Poor
Low light is one of the biggest causes of shaky photos. When there is not enough light, cameras often use slower shutter speeds automatically.
Increasing ISO allows your camera to capture images faster.
Example:
Without increasing ISO:
- Shutter speed: 1/20 second
- Result: blurry image
With higher ISO:
- Shutter speed: 1/200 second
- Result: sharper image
Modern cameras handle higher ISO settings much better than older models. A slightly noisy but sharp photo is usually better than a clean but blurry image.
Choose the Right Camera Mode
Automatic modes do not always choose settings that prevent camera shake. Learning basic manual controls gives you more control.
Useful modes include:
Shutter Priority Mode (Tv/S)
This mode allows you to select shutter speed while the camera automatically adjusts other settings.
It is useful for:
- Moving subjects
- Sports
- Wildlife
- Street photography
Manual Mode (M)
Manual mode gives complete control over:
- Shutter speed
- Aperture
- ISO
This is useful when lighting conditions remain consistent.
Aperture Priority Mode (A/Av)
This mode lets you control depth of field while the camera adjusts shutter speed. Be careful because the camera may choose a shutter speed that is too slow for handheld photography.
Use a Tripod for Maximum Stability
A tripod remains one of the most effective solutions for preventing camera shake.
Tripods are useful for:
- Night photography
- Long exposure photography
- Landscape images
- Astrophotography
- Product photography
- Architecture photography
A tripod removes hand movement completely, allowing you to use slower shutter speeds without losing sharpness.
When using a tripod:
- Turn off lens stabilization if recommended by your manufacturer
- Use a remote shutter or timer
- Avoid touching the camera during exposure
Advanced Techniques to Fix Shaky Hands Photography
Basic camera handling can solve many blurry photo problems, but advanced techniques help photographers achieve consistently sharp results in challenging situations. Professional photographers combine camera settings, equipment choices, and shooting habits to reduce even small movements.
Use the Two-Second Timer or Remote Shutter
Many photographers create camera shake without realizing it. Pressing the shutter button with force can move the camera slightly at the exact moment the image is captured.
A simple solution is using:
- Two-second self-timer
- Wireless remote shutter
- Smartphone camera remote control
- Cable release
This technique is especially helpful when using:
- Tripods
- Long exposure settings
- Macro photography
- Night photography
For example, if your camera is mounted on a tripod for a landscape photo, touching the shutter button can still create small vibrations. A timer allows the camera to settle before capturing the image.
Practice Controlled Breathing Techniques
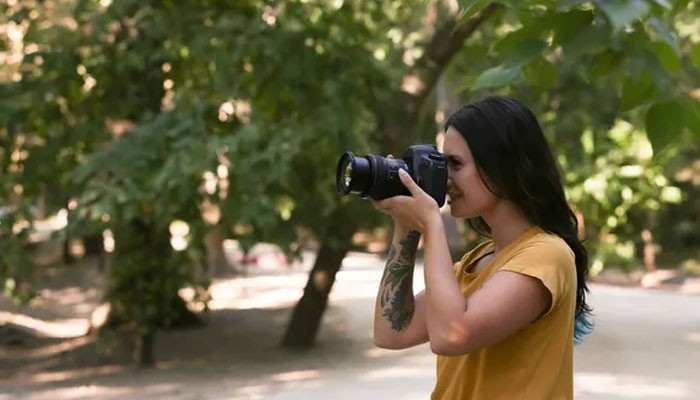
Breathing affects camera stability, especially when using slower shutter speeds.
A common photography technique is:
1. Prepare your composition
2. Hold the camera firmly
3. Take a slow breath
4. Release most of your breath
5. Press the shutter gently
Avoid holding your breath for too long because it can create body tension.
Relaxed muscles create better stability than stiff hands.
Avoid Pressing the Shutter Button Too Hard
A common beginner mistake is pushing the shutter button quickly and forcefully.
Instead:
- Place your finger gently on the button
- Slowly press halfway first for autofocus
- Press completely with smooth movement
The goal is to capture the photo without disturbing the camera position.
Think of the shutter button like a light switch, not a button you need to push with strength.
Improve Your Grip Strength and Hand Control
For photographers who regularly experience shaky hands, improving hand control can help.
Simple exercises include:
- Holding your camera for short practice sessions
- Using grip trainers
- Practicing slow shutter photography
- Strengthening wrist muscles
However, avoid excessive hand exercises before important shoots because tired muscles may increase shaking.
Choose Lightweight Photography Equipment
Heavy cameras and large lenses increase physical strain. After carrying equipment for several hours, hand fatigue can make camera shake worse.
For travel and everyday photography, consider:
| Equipment Type | Benefit |
| Mirrorless camera | Lightweight body |
| Prime lens | Smaller and easier to handle |
| Compact tripod | Easy to carry |
| Camera strap | Reduces hand pressure |
| Lens support | Improves balance |
A balanced setup is often easier to control than a heavier professional system.
How to Fix Shaky Hands Photography on a Smartphone
Smartphone cameras have improved significantly, but shaky hands can still create blurry images, especially in low light.
Modern phones use:
- Optical Image Stabilization (OIS)
- Electronic Image Stabilization (EIS)
- AI image processing
- Night photography algorithms
However, technique still matters.
Smartphone Photography Tips:
Hold Your Phone With Both Hands
Using both hands creates more stability than one-handed shooting.
Use the Volume Button as a Shutter
On many smartphones, pressing the volume button can reduce screen movement.
Avoid Digital Zoom
Digital zoom magnifies small movements and often increases blur.
Instead:
- Move closer to the subject
- Use optical zoom if available
Clean Your Camera Lens
A dirty lens can make photos appear blurry even when your hands are steady.
Clean your camera lens regularly with:
- Microfiber cloth
- Lens cleaning solution
Camera Settings That Help Prevent Blurry Photos
Correct settings are one of the most important parts of learning how to fix shaky hands photography.
Recommended Settings Guide
| Situation | Recommended Setting |
| Indoor photos | ISO 400–1600, shutter 1/125 sec+ |
| Outdoor portraits | ISO 100–400, shutter 1/125 sec+ |
| Night photography | Tripod, low ISO, longer exposure |
| Moving subjects | 1/500 sec or faster |
| Wildlife | 1/1000 sec or faster |
| Street photography | 1/250 sec or faster |
Remember that settings depend on lighting, camera type, and subject movement.
Understand the Difference Between Camera Shake and Subject Motion Blur
Many photographers blame shaky hands when the real problem is subject movement.
| Problem | Cause | Solution |
| Camera shake | Photographer movement | Faster shutter speed, stabilization, tripod |
| Subject blur | Moving object | Faster shutter speed, tracking autofocus |
| Focus blur | Wrong focus point | Improve autofocus settings |
| Motion blur | Long exposure | Adjust camera settings |
For example, a person standing still may become blurry because your hands moved. A running child may remain blurry even if your camera is perfectly stable.
Use Autofocus Correctly
Incorrect focus can make a sharp photo appear blurry.
Modern cameras include autofocus systems such as:
- Face detection autofocus
- Eye autofocus
- Continuous autofocus (AF-C/Servo)
- Tracking autofocus
For moving subjects:
Use:
- Continuous autofocus
- Burst mode
- Subject tracking
For portraits:
Use:
- Eye autofocus
- Single-point autofocus
A perfectly stable camera still needs ac`curate focus.
Shoot in Burst Mode
Burst mode captures several photos quickly with one shutter press.
This technique helps because:
- Your first photo may contain movement
- Later frames may be sharper
- You can select the best image afterward
Burst mode works well for:
- Wildlife
- Sports
- Children
- Street photography
Professional photographers often use this method when capturing unpredictable moments.
Edit Shaky Photos Carefully
Editing software can improve slightly blurry photos, but it cannot completely repair heavy camera shake.
Modern editing tools include:
- Sharpening
- Noise reduction
- AI enhancement
- Clarity adjustment
Popular tools include:
- Adobe Lightroom
- Adobe Photoshop
- Capture One
- DxO PhotoLab
When editing:
Avoid adding too much sharpness because it can create unnatural edges and increase noise.
Common Mistakes That Cause Shaky Photos
Many blurry images happen because of simple mistakes.
Mistake 1: Using Slow Shutter Speed
A shutter speed of 1/15 second may work with a tripod but is difficult handheld.
Mistake 2: Holding the Camera Incorrectly
Weak grip and stretched arms create instability.
Mistake 3: Ignoring Stabilization Settings
Some photographers forget to activate lens or body stabilization.
Mistake 4: Using Heavy Equipment Without Support
Large lenses require proper technique and support.
Mistake 5: Rushing the Shot
Quick movements often create camera vibration.
Photography Situations That Need Extra Stability
Some photography styles require more attention to camera movement.
Night Photography
Low light requires longer exposures, making stability essential.
Recommended:
- Tripod
- Remote shutter
- Low ISO
- Manual focus when needed
Macro Photography
Close-up photography magnifies even tiny movements.
Helpful tools:
- Tripod
- Focus rail
- Image stabilization
- Higher shutter speed
Wildlife Photography
Long lenses magnify hand movement.
Helpful techniques:
- Faster shutter speeds
- Monopod
- Lens stabilization
- Proper stance
Street Photography
Street photographers often work quickly, so stability comes from:
- Correct grip
- Faster shutter speeds
- Lightweight cameras
Professional Checklist Before Taking Photos
Use this quick checklist:
- Check your shutter speed
- Hold the camera correctly
- Relax your shoulders
- Keep elbows close
- Enable stabilization
- Clean your lens
- Focus correctly
- Avoid unnecessary movement
- Use support when needed
Best Equipment to Reduce Camera Shake
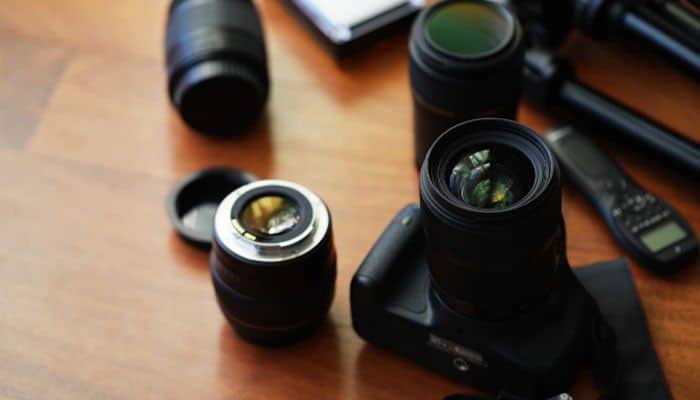
While photography skills are the foundation of sharp images, the right equipment can make the process easier. Professional photographers do not depend only on expensive gear; they choose tools that match their shooting style and environment.
Below are some useful accessories that can help reduce camera movement.
| Equipment | How It Helps Reduce Shake |
| Tripod | Provides complete camera stability for long exposures |
| Monopod | Supports heavy lenses while allowing movement |
| Camera grip | Improves hand comfort and control |
| Remote shutter | Prevents vibration caused by pressing buttons |
| Image-stabilized lens | Reduces small hand movements |
| Camera strap | Adds extra support while shooting handheld |
| Gimbal | Stabilizes video and moving shots |
Choosing the right equipment depends on what type of photography you enjoy.
Use a Monopod for Heavy Camera Setups
A tripod provides maximum stability, but it is not always practical. Wildlife photographers, sports photographers, and event photographers often need to move quickly.
A monopod offers a balance between:
- Mobility
- Weight support
- Camera stability
It is especially useful when using:
- Telephoto lenses
- Large DSLR cameras
- Professional zoom lenses
A monopod reduces arm fatigue and helps maintain a steady frame for longer periods.
Try a Camera Cage or Hand Grip
For photographers who shoot videos or long sessions, a camera cage or additional grip can improve handling.
Benefits include:
- Better camera balance
- More comfortable holding position
- Reduced wrist pressure
- More control during movement
This is especially helpful for hybrid photographers who capture both photos and videos.
Understand Lens Stabilization vs Camera Stabilization
Many modern cameras offer stabilization, but there are different types.
Lens-Based Stabilization
The stabilization system is built into the lens.
Advantages:
- Works well with telephoto lenses
- Helps stabilize the viewfinder image
- Useful for handheld photography
In-Body Image Stabilization (IBIS)
The stabilization system is inside the camera body.
Advantages:
- Works with multiple lenses
- Helps older lenses perform better
- Useful for low-light photography
Some cameras combine both systems for improved results.
Advanced Camera Techniques Used by Professionals
Professional photographers use several small techniques together to achieve sharp images.
Half-Press the Shutter Button
Before taking the photo:
1. Half-press the shutter button
2. Allow autofocus to lock
3. Confirm composition
4. Press gently
This prevents rushed movements.
Use Back Button Focus
Many advanced photographers separate focusing from the shutter button.
Instead of:
- Half-press shutter = focus + capture
They use:
- Back button = focus
- Shutter button = capture
Benefits:
- Better focus control
- Faster shooting
- Less accidental movement
This technique is popular among wildlife and sports photographers.
Improve Your Photography Environment
Sometimes the environment creates camera shake.
Windy Conditions
Strong wind can move:
- Camera straps
- Tripods
- Long lenses
Solutions:
- Lower your tripod
- Remove hanging straps
- Use your body as a wind barrier
Uneven Ground
Shooting on unstable surfaces can affect balance.
Try:
- Standing firmly
- Adjusting tripod legs
- Avoiding loose surfaces
Crowded Locations
In busy areas:
- Keep elbows close
- Use compact equipment
- Avoid sudden movements
How to Practice Taking Sharper Photos
Improving stability requires practice. A photographer can train their hands and technique through regular exercises.
Practice Exercise 1: Slow Shutter Challenge
Try taking handheld photos at:
- 1/60 second
- 1/30 second
- 1/15 second
Compare the results and learn your personal limit.
Practice Exercise 2: Static Subject Practice
Photograph objects that do not move:
- Books
- Plants
- Buildings
- Furniture
Focus only on camera stability.
Practice Exercise 3: Low-Light Practice
Practice evening photography to understand:
- ISO changes
- Shutter speed limits
- Stabilization performance
How to Fix Shaky Hands Photography When Shooting Videos
Camera shake affects video even more because viewers notice movement continuously.
For smoother videos:
- Use a tripod
- Use a gimbal
- Enable electronic stabilization
- Hold the camera with both hands
- Move slowly while recording
Walking shots especially benefit from stabilization equipment.
When Shaky Hands May Be Related to Physical Factors
Sometimes hand movement is not caused by photography technique.
Temporary shaking may happen because of:
- Lack of sleep
- Stress
- Too much caffeine
- Cold weather
- Muscle fatigue
- Long shooting sessions
Photography habits that can help:
- Take short breaks
- Keep hands warm
- Stay hydrated
- Avoid excessive caffeine before important shoots
If hand shaking happens frequently in daily activities, consider discussing it with a healthcare professional.
Final Thoughts
Learning how to fix shaky hands photography is about building better habits rather than depending on expensive equipment. Sharp images come from a combination of proper camera settings, stable handling techniques, good lighting decisions, and understanding your equipment.
Start with simple improvements: increase your shutter speed, hold your camera correctly, practice controlled movements, and use support when needed. Over time, these small changes will help you capture clearer photos in different situations, from everyday moments to professional photography projects.
Photography is a skill that improves through observation and practice. The more you understand how movement affects your camera, the easier it becomes to create sharp, high-quality images consistently.
How to Fix Shaky Hands Photography FAQs
1. Why are my photos blurry even when I hold my camera still?
Photos can appear blurry because of slow shutter speed, incorrect focus, subject movement, poor lighting, or lens issues. Camera stability is only one part of image sharpness.
2. What shutter speed prevents shaky hands photography problems?
For most handheld photography, a shutter speed of 1/125 second or faster works well. However, the ideal speed depends on your lens, subject, lighting, and personal stability.
3. Does a tripod completely stop camera shake?
A tripod removes most photographer movement, but vibrations from touching the camera, wind, or unstable surfaces can still affect sharpness. Using a timer or remote shutter improves results.
4. Can image stabilization fix shaky hands photography?
Image stabilization can reduce small movements caused by your hands, but it cannot correct moving subjects or extreme camera shake.
5. How can I make my phone photos less shaky?
Use both hands, clean your lens, enable stabilization features, avoid digital zoom, and use better lighting whenever possible.
6. Is a more expensive camera better for shaky hands?
A premium camera may include better stabilization and autofocus, but technique remains the most important factor. A skilled photographer can capture sharp images with basic equipment.
7. Why are my night photos always blurry?
Night photos often become blurry because cameras use slower shutter speeds to collect enough light. Using a tripod, increasing ISO, or using a wider aperture can help.
8. Should I turn image stabilization off when using a tripod?
Some camera systems recommend turning stabilization off on a tripod because the system may try to correct movement that does not exist. Always check your camera or lens instructions.