


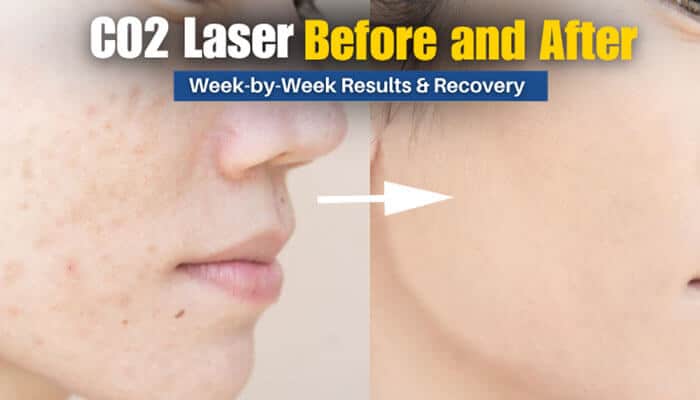

CO2 laser before and after results can look dramatic, but the transformation does not happen immediately. The treated skin normally passes through redness, swelling, tenderness, oozing, crusting, peeling, and lingering pinkness before improvements in acne scars, wrinkles, or skin texture become easier to evaluate.
Recovery also depends heavily on the treatment method. Fractional CO2 resurfacing creates microscopic columns of injury while leaving areas of surrounding skin untreated. Fully ablative CO2 resurfacing removes a more continuous layer of skin and usually involves a longer and more intensive recovery.
Treatment depth, energy, density, skin tone, scar type, practitioner experience and aftercare can all influence CO2 laser before and after results. Photographs therefore need context: the exact treatment, number of sessions, combination procedures and follow-up period all matter.
This guide explains what typically happens before treatment, on procedure day, during each stage of recovery and throughout the months when deeper skin remodeling continues.
Quick Answer: What Do CO2 Laser Before and After Results Look Like?
Immediately after treatment, CO2 laser before and after changes may appear worse before they look better. The skin may initially look red, swollen, raw, bronze, or darker than expected. Dryness, crusting and peeling commonly develop during the first week.
Surface healing often takes approximately one to two weeks after fractional treatment. Depending on the intensity and condition being treated, visible recovery may take 10 to 21 days. Stronger fully ablative procedures can require longer.
Redness may remain after the surface has closed and can take several weeks or months to fade. Early texture changes may appear after the initial healing period, but acne scars and wrinkles are generally evaluated over three to six months because improvement can continue after the peeling stops.
CO2 Laser Before and After Results at a Glance
| Question | General Answer |
| When does peeling usually begin? | Around days 4–7 |
| How long does surface healing take? | Often 1–2 weeks after fractional treatment |
| When can redness fade? | Several weeks to several months |
| When can makeup usually resume? | After the surface has fully healed and the provider approves |
| When are early results visible? | After redness and peeling begin to settle |
| When should scars and wrinkles be judged? | Commonly at 3–6 months |
| Can improvement continue longer? | Yes, results may continue improving for up to a year |
| Is one session always enough? | No; fractional treatment may require multiple sessions |
| Are results permanent? | Improvements may last for years, but aging and sun damage continue |
| Can every acne scar be removed? | No; deep or tethered scars often need combination treatment |
These estimates are general rather than guaranteed. Treatment settings, the condition being addressed, treatment area and individual healing can change the timeline.
Key Takeaways
- Fractional and fully ablative CO2 treatments have different recovery periods and risk profiles.
- Surface healing is different from complete biological recovery.
- Redness, swelling, stinging, oozing, crusting and peeling can occur during early recovery.
- Rolling and shallow boxcar scars may respond more favorably than deep ice-pick scars.
- CO2 laser can improve scars and wrinkles without removing them completely.
- Darker skin tones require careful treatment planning because pigment changes may be more noticeable or persistent.
- Melasma should not automatically be treated like ordinary sun damage.
- Picking crusts, exposing healing skin to sunlight, and restarting irritating products too early may increase complications.
- Reliable CO2 laser before and after photos should use consistent lighting, angles, distance, makeup status, and facial expressions.
- The least expensive provider is not necessarily the safest or most qualified.
What Is CO2 Laser Resurfacing?
A carbon dioxide laser emits infrared energy at a wavelength of approximately 10,600 nanometers. Water inside the skin absorbs this energy, allowing the device to remove tissue precisely and create controlled heat in deeper layers.
During ablative resurfacing, the laser removes part of the epidermis and heats the dermis underneath. This controlled injury promotes surface healing, collagen contraction, and longer-term remodeling, which may make the healed skin look smoother and firmer.
CO2 laser resurfacing may be considered for:
- Fine or moderate wrinkles
- Sun-damaged skin
- Uneven skin texture
- Selected age spots
- Mild to moderate atrophic acne scars
- Certain surgical or traumatic scars
- Rough or crepey skin
- Mild skin laxity
Laser resurfacing can improve these concerns, but it cannot replace a facelift, correct substantial sagging or guarantee the complete removal of scars, pores, wrinkles, or discoloration.
Fractional CO2 Laser vs. Fully Ablative CO2 Laser
Understanding which method was used is essential when reviewing CO2 laser before and after photographs.
| Feature | Fractional CO2 Laser | Fully Ablative CO2 Laser |
| Treatment pattern | Creates microscopic treatment columns with untreated skin between them | Removes a more continuous layer of skin |
| Intensity | Can range from conservative to aggressive | Generally more intensive |
| Surface healing | Often approximately 1–2 weeks | Frequently longer |
| Redness | May remain after peeling stops | Often stronger and more prolonged |
| Sessions | Several sessions may be recommended | Sometimes performed as one intensive session |
| Main advantage | Faster recovery than traditional full-field ablation | Potentially greater correction from one treatment |
| Main limitation | May require repeated sessions | Greater downtime and complication risk |
| Wound care | Requires careful cleansing and protection | Usually requires more intensive aftercare |
Fractional treatment leaves closely spaced areas of untreated tissue that assist with surface repair. However, “fractional” does not automatically mean mild. High energy, density, depth or multiple passes can still produce considerable inflammation and downtime.
Fractional ablative treatment should also not be confused with nonablative fractional laser treatment. Fractional CO2 laser removes microscopic columns of tissue, while nonablative devices heat the skin without creating the same open ablative wound.
Who Is a Good Candidate for CO2 Laser Resurfacing?
A suitable candidate generally has a concern that can reasonably respond to resurfacing, understands the expected downtime and can follow a detailed wound-care routine.
Treatment may be considered for people with:
- Fine or moderate facial wrinkles
- Mild to moderate atrophic acne scars
- Shallow rolling or boxcar scars
- Rough or uneven texture
- Selected signs of photoaging
- Certain stable surgical scars
- Realistic expectations
- Enough time for visible recovery
- The ability to follow sun-protection instructions
A person expecting perfectly smooth, poreless, or scar-free skin is unlikely to be satisfied with their CO2 laser before and after outcome.
Who May Need to Delay or Avoid Treatment?
A clinician may recommend postponing treatment, using conservative settings or choosing another procedure when a patient has:
- Active acne, open wounds or infection
- A recent cold sore or herpes outbreak
- A history of keloids or abnormal scarring
- Poor wound healing
- Significant immune suppression
- Certain autoimmune or connective-tissue conditions
- Previous radiation treatment to the area
- A recent tan or heavy sun exposure
- Pregnancy or breastfeeding
- Certain eyelid-position problems
- Current or recent isotretinoin exposure
- Expectations that resurfacing cannot achieve
Active infection, herpes outbreaks, radiation-related damage, and conditions that interfere with surface healing are important concerns during patient selection.
Recommendations involving isotretinoin and cosmetic procedures have evolved. Patients should disclose current or previous use and allow the treating physician to make an individualized decision instead of relying on a universal waiting period found online.
What Can Realistic CO2 Laser Before and After Results Show?
Realistic CO2 laser before and after results may include:
- Softer acne-scar edges
- Shallower rolling or boxcar scars
- Smoother skin texture
- Reduced appearance of fine lines
- Mild tightening
- More even-looking photoaging
- Better blending of scars with surrounding skin
- Improvement in rough or crepey areas
The procedure does not normally produce scar-free or poreless skin.
Expected Results by Skin Concern
| Concern | What CO2 Laser May Improve | Important Limitation |
| Rolling acne scars | Texture, sloping edges and visible depth | Tethered scars may also need subcision |
| Shallow boxcar scars | Sharp borders and surface depth | Deep boxcar scars may need punch treatment or filler |
| Ice-pick scars | Some edge softening | Often respond less predictably than rolling scars |
| Fine lines | Surface smoothness and crepey texture | Deep expression lines will remain |
| Sun damage | Roughness and selected uneven pigmentation | Treatment does not prevent future sun damage |
| Enlarged-looking pores | Overall texture may appear smoother | Pores cannot be permanently removed |
| Mild laxity | Some tightening from collagen contraction and remodeling | It cannot replace lifting surgery |
| Melasma | Not generally a first-line indication | Heat and inflammation may worsen pigmentation |
Acne-scar response depends on the depth and structure of each scar rather than simply whether a patient has acne scars.
What Affects CO2 Laser Before and After Results?
Two patients can receive treatment using the same general type of device and experience different recoveries and outcomes.
| Result Factor | Why It Matters |
| Condition treated | Scars, wrinkles and pigment concerns respond differently |
| Fractional or fully ablative method | Fully ablative treatment creates a more extensive wound |
| Energy and depth | Higher settings may increase both remodeling and complications |
| Treatment density | Greater coverage creates more inflammation |
| Number of passes | Additional passes can increase heat and depth |
| Skin tone | Pigment changes may be more noticeable or persistent |
| Scar structure | Tethered or deep scars often need combination treatment |
| Practitioner experience | Settings must be individualized |
| Number of sessions | Conservative treatment may require repetition |
| Aftercare | Infection, picking, and ultraviolet exposure can disrupt healing |
| Nicotine use | Smoking and nicotine can impair wound healing |
| Photography | Lighting and swelling can exaggerate apparent change |
Higher settings do not automatically produce proportionally better results. In some patients, conservative energy and density can provide improvement while reducing the likelihood of prolonged redness or pigmentation changes.
An accurate CO2 laser before and after case should state:
- The laser device and treatment method
- The number of sessions
- The time between treatment and the final photograph
- The treatment area
- Additional procedures performed
- Whether the image was edited or retouched
A photograph taken while mild swelling remains may temporarily make scars or wrinkles appear smoother than they will after the swelling resolves.
Preparing for CO2 Laser Before and After Recovery
Preparation can influence both safety and the quality of the eventual result.
Choose an Appropriately Qualified Practitioner
Look for a dermatologist or plastic surgeon with documented experience in ablative laser resurfacing and in treating patients with your skin tone.
Ask to see photographs of patients who had:
- A similar skin tone
- The same type of scar or wrinkle
- A comparable treatment intensity
- The same device or resurfacing technique
- A similar number of sessions
The practitioner’s training matters because laser selection, energy, density, depth, pulse duration and aftercare can all affect the result.
Discuss Your Complete Medical History
Tell the clinician about:
- Previous cold sores, herpes or shingles
- Active acne or recurrent infections
- Keloid or hypertrophic scars
- Previous facial radiation
- Autoimmune or connective-tissue conditions
- Pregnancy or breastfeeding
- Previous laser procedures
- Prescription medicines
- Supplements
- Isotretinoin exposure
- Smoking, vaping or nicotine
- Recent tanning
- Medication or dressing allergies
- Microblading, permanent makeup or tattoos near the treatment area
People with a history of cold sores may be prescribed antiviral medication because resurfacing can reactivate herpes simplex.
Avoid Tanning and Heavy Sun Exposure
A recent tan may increase pigment risk and make treatment settings harder to select safely.
Avoid tanning or heavy sun exposure before treatment. Use broad-spectrum sunscreen with an SPF of at least 30 unless your provider gives different instructions.
Review Medicines and Skincare Products
A provider may ask you to temporarily stop products that increase irritation, including:
- Prescription retinoids
- Retinol
- Glycolic acid
- Lactic acid
- Salicylic acid
- Benzoyl peroxide
- Exfoliating scrubs
- At-home peels
Some medicines can increase sensitivity to laser energy or light. Do not stop prescription medication without consulting the clinician who prescribed it.
Plan for Recovery
Before the procedure:
- Arrange transportation when sedation will be used.
- Purchase only wound-care products recommended by the clinic.
- Prepare clean towels, pillowcases and cold packs.
- Schedule time away from work and social events.
- Avoid booking treatment immediately before travel or an important occasion.
- Confirm how to contact the clinic outside office hours.
- Ask when the first follow-up appointment will occur.
Good preparation can make the CO2 laser before and after recovery process easier to manage.
What Happens During a CO2 Laser Appointment?
CO2 laser resurfacing is commonly performed as an outpatient procedure.
Before Treatment Begins
The clinical team may:
- Clean and photograph the treatment area
- Confirm medicines and allergies
- Apply numbing cream
- Inject local anesthetic
- Perform nerve blocks
- Provide oral or intravenous sedation
- Place protective eye shields
- Mark treatment boundaries or individual scars
Limited fractional treatment may use topical or local anesthesia. More extensive resurfacing may require sedation or, in selected cases, general anesthesia.
During the Procedure
The practitioner passes the laser over the treatment area according to the planned energy, density, pulse duration and number of passes.
Patients may notice:
- Heat
- Pressure
- Snapping sensations
- A burning smell
- Discomfort despite anesthesia
Ablative laser resurfacing commonly takes between 30 minutes and two hours depending on the technique and size of the area.
Immediately After Treatment
The clinical team may apply:
- Petroleum-based ointment
- A prescribed antibacterial cream
- A non-stick dressing
- Cold compresses
- Prescription medication
- Written cleansing instructions
Aftercare varies between clinics and treatment methods. Apply only the ointments, dressings and cleansers specifically approved by the treating provider.
CO2 Laser Before and After Recovery Timeline
| Time After Treatment | What the Skin May Look or Feel Like | What Is Happening |
| First 24 hours | Redness, heat, swelling, stinging and possible oozing | Controlled injury activates inflammation and repair |
| Days 2–3 | Swelling, tenderness and darker or bronze color | Early wound healing continues |
| Days 4–7 | Dryness, crusting, flaking and peeling | Damaged surface tissue begins shedding |
| Week 2 | New pink skin and less discomfort | The epidermal barrier is rebuilding |
| Weeks 3–4 | Persistent pinkness and early texture change | Inflammation decreases and remodeling begins |
| Weeks 5–8 | Redness fades; pigment changes may become visible | Pigment cells can remain reactive |
| Months 2–3 | Texture and fine-line changes become easier to assess | Remodeling becomes more apparent |
| Months 3–6 | Scars and wrinkles may continue softening | Longer-term structural changes continue |
| Months 6–12 | The result becomes more stable | Improvement may continue gradually |
The timing varies according to treatment intensity, the area treated and individual healing.
CO2 Laser Before and After: Week-by-Week Recovery
Treatment Day: Redness, Heat and Swelling
Immediately after treatment, the skin may look intensely red and swollen. It may feel hot, tight, tender or similar to a strong sunburn.
More intensive resurfacing may cause:
- Pinpoint bleeding
- Clear or pale-yellow oozing
- A raw appearance
- Temporary darkening
- Blistering
- Significant facial swelling
Cold packs may be used for comfort. Do not apply makeup, essential oils, active skincare products or unapproved home remedies.
The treatment-day appearance should never be mistaken for the final CO2 laser before and after result.
Days 1–3: Swelling and Early Wound Care
Swelling may peak during the first few days and can make the face appear temporarily fuller or uneven.
The treatment team may recommend:
- Applying a wrapped cold pack
- Sleeping with the head elevated
- Cleaning the area using the prescribed method
- Reapplying the approved dressing or ointment
- Taking prescribed antiviral medication
- Avoiding unnecessary touching
Swelling can temporarily soften scars, while oozing and crusting can temporarily make texture appear worse.
Days 4–7: Crusting, Bronzing and Peeling
The treated skin often becomes dry, rough, dotted, brown or bronze before peeling.
During this stage:
- Do not pull off peeling skin.
- Do not scratch or remove crusts.
- Do not use exfoliating brushes.
- Do not shave over open areas.
- Do not apply makeup to unhealed skin.
- Do not restart retinoids or acids.
- Avoid direct sunlight.
Picking can damage immature skin and increase the risk of infection, pigmentation changes or scarring.
Week 2: New Pink Skin Appears
By the second week, much of the crusting may have resolved after fractional treatment. The surface may appear smooth, shiny, pink or unusually sensitive.
At this stage:
- Discomfort should generally be decreasing.
- Redness may remain highly visible.
- The skin barrier is still vulnerable.
- Makeup should wait until the surface has healed.
- Sunscreen should be introduced according to provider instructions.
Although the skin may look substantially better, the CO2 laser before and after transformation is not yet complete.
Weeks 3–4: Redness Remains
The skin may look more presentable during weeks three and four, but pinkness can remain.
Early changes may include:
- A smoother surface
- Less roughness
- A brighter appearance
- Mild softening of fine lines
- Better blending of shallow scars
New skin may cover the treatment area before deeper recovery is complete. Scars and wrinkles should not be judged at this stage.
Weeks 5–8: Redness Fades and Pigment Changes May Appear
Redness often continues fading during the second month, although it may last longer after aggressive treatment.
Possible pigment changes include:
- Temporary brown or gray patches
- Uneven darkening
- Lighter areas
- Greater contrast between treated and untreated skin
Do not attempt to bleach or aggressively exfoliate new pigmentation without medical advice.
Months 2–3: Results Become Easier to Assess
By the second or third month, reduced redness allows a more meaningful CO2 laser before and after comparison.
Possible improvements include:
- Softer fine lines
- Smoother texture
- Reduced scar depth
- More even-looking photoaging
- Mild tightening
- Improved elasticity
Results can still change after this point.
Months 3–6: Remodeling Continues
Scars and wrinkles should not be judged as soon as peeling stops.
Changes may continue as redness fades and the dermis remodels. Formal after photographs are often taken three to six months after treatment rather than during the initial recovery.
Months 6–12: Evaluate the Longer-Term Outcome
By six months, the result is generally more stable. Some improvements may continue for up to a year, although normal aging and new sun damage continue.
At this point, the clinician may discuss:
- Another fractional session
- Subcision
- Punch excision or elevation
- Filler
- TCA CROSS
- Microneedling
- Radiofrequency microneedling
- Treatment for remaining pigmentation
Social Downtime vs. Complete Healing
“Downtime” can have several meanings.
| Type of Recovery | Meaning |
| Physical downtime | Time when swelling, discomfort or wound care limits normal activities |
| Social downtime | Time before a person feels comfortable being seen in public |
| Surface healing | Time required for the epidermal surface to close |
| Biological recovery | Continued reduction in redness, sensitivity and inflammation |
| Skin remodeling | Months during which deeper structural changes continue |
A patient may return to work after one or two weeks while still experiencing redness, sensitivity and incomplete biological recovery.
This distinction is important when interpreting CO2 laser before and after recovery claims made by clinics.
CO2 Laser Before and After Acne Scars
Fractional CO2 resurfacing is primarily used for atrophic acne scars—depressions caused by tissue loss and altered collagen.
Rolling Scars

Rolling scars have sloping edges and create a wave-like texture. They may respond well to resurfacing, particularly when they are shallow.
Tethered rolling scars remain attached to deeper fibrous bands. Subcision may be needed to release the scar before or alongside laser treatment.
Boxcar Scars
Boxcar scars have more defined borders. Shallow boxcar scars may improve as resurfacing softens their edges and stimulates remodeling.
Deep boxcar scars may require:
- Punch elevation
- Punch excision
- Filler
- Subcision
- Combination treatment
Ice-Pick Scars
Ice-pick scars are narrow and extend deeply into the skin. They generally respond less predictably to broad fractional resurfacing than shallow rolling scars.
Targeted options may include:
- TCA CROSS
- Punch excision
- Punch elevation
- Pinpoint laser treatment
- Combination therapy
Because ice-pick scars are deeper, CO2 laser before and after acne-scar results may be more limited when resurfacing is used alone.
What Percentage of Improvement Is Realistic?
There is no reliable percentage that applies to every patient.
Results differ because studies use different:
- Laser devices
- Energy settings
- Treatment densities
- Numbers of passes
- Scar-grading systems
- Skin tones
- Session counts
- Follow-up periods
Some patients achieve noticeable improvement, while others have modest changes and require combination treatment.
Clinics that promise complete scar removal or guarantee a fixed percentage of improvement should be approached cautiously.
CO2 Laser Before and After Wrinkles and Sun Damage
CO2 resurfacing can improve fine lines, rough texture and selected signs of photoaging by removing damaged surface tissue and stimulating deeper remodeling.
Common treatment areas include:
- Fine lines around the mouth
- Fine lines around the eyes
- Crepey texture
- Roughness caused by sun exposure
- Selected age spots
- Uneven surface texture
It is less effective for:
- Significant sagging
- Deep folds caused by volume loss
- Dynamic wrinkles caused by repeated muscle movement
- Structural changes requiring surgery
When evaluating CO2 laser before and after wrinkles, remember that resurfacing can soften lines but cannot reproduce the lifting or repositioning achieved by surgery.
Does CO2 Laser Permanently Shrink Pores?
CO2 laser may make enlarged-looking pores less noticeable by smoothing the surrounding texture and remodeling collagen. It does not eliminate sebaceous glands or permanently close pores.
Pore appearance can later be influenced by:
- Oil production
- Acne
- Sun damage
- Skin aging
- Hormonal changes
- Skincare habits
“Permanent pore removal” is not a realistic treatment claim.
CO2 Laser Before and After for Darker Skin Tones
Brown or Black skin is not automatically excluded from CO2 treatment, but careful patient selection and experienced treatment are essential.
Darker skin may have a greater risk of:
- Post-inflammatory hyperpigmentation
- Burns
- Prolonged discoloration
- Noticeable hypopigmentation
- Uneven contrast between treated and untreated areas
Safety measures may include:
- Conservative energy and density
- A test area
- Treating active pigmentation first
- Avoiding recently tanned skin
- Strict sun protection
- Additional follow-up
- Considering a less aggressive alternative
Patients should review CO2 laser before and after photos from people with a similar skin tone rather than relying only on results from lighter skin.
CO2 Laser and Melasma: Important Caution
Melasma should not automatically be treated like ordinary sun damage.
Melasma is a recurring pigment disorder influenced by ultraviolet exposure, visible light, hormones, heat and inflammation. Aggressive resurfacing may activate pigment-producing cells and worsen discoloration.
A dermatologist may recommend:
- Stabilizing melasma first
- Daily tinted sunscreen containing iron oxide
- Prescription topical treatment
- Conservative non-CO2 procedures
- A test spot
- Avoiding laser treatment
CO2 laser should not be described as a guaranteed melasma cure. A misleading CO2 laser before and after melasma photo may show short-term fading without revealing later recurrence or pigmentation.
Normal Side Effects vs. Warning Signs
| Often Expected During Healing | Contact the Treatment Team |
| Redness | Rapidly worsening redness |
| Mild to moderate swelling | Increasing swelling after initial improvement |
| Burning or stinging | Severe or escalating pain |
| Itching | Fever or chills |
| Clear or pale oozing | Thick green or yellow drainage |
| Dryness and peeling | Foul odor |
| Temporary bronzing | New clusters of blisters |
| Temporary sensitivity | Uncontrolled bleeding |
| Mild crusting | Vision changes |
| Lingering pinkness | Delayed or non-healing areas |
Expected symptoms should generally improve rather than become progressively worse.
Possible Complications
Complications can include:
- Bacterial infection
- Fungal infection
- Herpes reactivation
- Acne flares
- Milia
- Prolonged redness
- Persistent hyperpigmentation
- Hypopigmentation
- Delayed healing
- Hypertrophic scarring
- Permanent scarring
- Eyelid-position changes after treatment near the eyes
Appropriate patient selection, preventive medication when indicated and close follow-up can reduce risk but cannot eliminate it.
CO2 Laser Aftercare Checklist
Aftercare differs according to the device, settings, treatment area and dressing method. Instructions from the treating clinic should take priority over general advice found online.
Follow the Prescribed Cleansing Routine
Some treatment plans use saline, diluted vinegar or a gentle cleanser. Others use a dressing-based approach.
Do not create your own solution or copy another patient’s routine. Follow the exact concentration and frequency given by the treatment team.
Keep the Area Moist or Covered as Directed
A prescribed ointment or dressing can protect the healing surface and prevent excessive drying.
Use only products recommended by the clinical team. Thick occlusive products may contribute to acne or milia in some patients.
Do Not Pick or Scrub
Allow crusts and peeling tissue to detach naturally.
Picking can:
- Damage immature skin
- Delay healing
- Introduce bacteria
- Increase pigmentation
- Increase scarring risk
Avoid Makeup Until the Surface Has Healed
Do not apply foundation, concealer or other cosmetics to raw, open or crusted skin.
Wait until the treatment area is completely healed and the treating provider approves makeup.
Protect the Skin From Sunlight
Avoid direct sunlight while the skin is open or healing.
Once sunscreen is permitted, use broad-spectrum SPF 30 or higher and combine it with:
- A wide-brimmed hat
- Shade
- Protective clothing
- Avoidance of strong midday sunlight
- Reapplication as directed
Tinted sunscreen containing iron oxide may provide additional visible-light protection for patients prone to melasma or post-inflammatory pigmentation.
Avoid Heat and Contaminated Water
Until the provider approves, avoid:
- Saunas
- Steam rooms
- Hot tubs
- Swimming pools
- Baths
- Very hot showers
- Heavy sweating
- Strenuous exercise
Restart Active Skincare Slowly
Do not automatically resume retinoids, exfoliating acids, scrubs, benzoyl peroxide or strong vitamin C products as soon as peeling stops.
The timing should be determined by the treating provider.
Avoid Smoking and Nicotine
Smoking and nicotine can interfere with normal wound healing and may delay the final CO2 laser before and after result.
What Can Delay CO2 Laser Healing?
Healing may take longer because of:
- High energy or treatment density
- Multiple laser passes
- Fully ablative treatment
- A large treatment area
- Infection
- Smoking or nicotine exposure
- Picking or scratching
- Excessive ultraviolet exposure
- Irritating skincare
- Poor adherence to wound care
- Medical conditions that affect healing
Stronger laser settings are generally associated with longer recovery.
How Many CO2 Laser Sessions Are Needed?
The number of sessions depends on:
- Treatment intensity
- Scar or wrinkle depth
- Skin tone
- Recovery tolerance
- Previous procedures
- Combination treatments
- The amount of improvement desired
A fully ablative procedure may sometimes be performed as one intensive session. Fractional treatment may require several sessions.
More sessions do not automatically produce better CO2 laser before and after results. The clinician must balance potential improvement against cumulative inflammation, pigment risk, cost and downtime.
CO2 Laser Before and After Cost
The price of treatment varies widely and cannot be estimated from the phrase “CO2 laser” alone.
Cost depends on:
- Fractional or fully ablative treatment
- Full-face or partial-face treatment
- Size of the treatment area
- Treatment intensity
- Practitioner experience
- Geographic location
- Anesthesia or sedation
- Facility charges
- Number of sessions
- Prescription medicines
- Follow-up care
- Combination procedures
The average U.S. cost of skin-resurfacing procedures such as laser resurfacing has been reported at approximately $1,829. This is not a CO2-specific price and represents only part of the total expense. It may not include anesthesia, facility charges or prescriptions.
Ask whether the quote includes:
- Consultation
- Practitioner fee
- Facility fee
- Anesthesia
- Medication
- Dressings
- Follow-up visits
- Aftercare products
- Touch-up treatment
- Management of complications
Most health insurance policies do not cover resurfacing performed solely for cosmetic purposes.
Selecting a provider based only on the lowest advertised price can be risky because ablative resurfacing creates a controlled medical wound.
CO2 Laser vs. Other Resurfacing Treatments
| Treatment | Potential Advantage | Main Limitation |
| Fractional CO2 laser | Strong resurfacing and collagen remodeling | More redness, peeling and pigment risk |
| Fully ablative CO2 | Potentially greater correction after one procedure | Longest recovery and greater risk |
| Er: YAG laser | Precise ablation with less surrounding thermal injury | May create less tightening in some settings |
| Nonablative fractional laser | Shorter downtime and no open ablative wound | More subtle results and repeated sessions |
| Radiofrequency microneedling | Lower surface-wound burden and useful for selected skin tones | Multiple sessions and variable results |
| Standard microneedling | Less downtime and lower intensity | Usually more modest improvement |
| Subcision | Releases tethered rolling scars | Does not resurface the entire skin surface |
| TCA CROSS | Targets narrow, deep scars | Does not improve general texture |
| Punch techniques | Correct selected deep scars | Treat scars individually |
| Chemical peel | Can improve selected pigmentation and surface texture | Risk depends on peel depth and skin tone |
The best treatment is not necessarily the strongest. It is the option that offers an acceptable balance among likely improvement, skin tone, scar structure, risk, and recovery.
Is CO2 Laser Worth It?
CO2 laser before and after results may justify the treatment for some patients, but not for everyone.
CO2 laser may be worth considering when:
- The concern is suitable for ablative resurfacing.
- Less intensive treatments have not produced enough improvement.
- The patient accepts visible downtime.
- The provider has relevant training and experience.
- The patient understands that several sessions or combination treatments may be needed.
- The likely improvement justifies the cost and risk.
It may be less suitable when:
- The patient cannot tolerate prolonged redness.
- Pigment risk is high.
- The main concern is deep sagging or volume loss.
- The scars require subcision or punch treatment first.
- The patient has active melasma or unstable pigmentation.
- Expectations involve complete scar or wrinkle removal.
- Proper wound care and sun avoidance are not practical.
A useful consultation should compare CO2 laser with at least one reasonable alternative rather than presenting it as the only option.
How to Take Accurate CO2 Laser Before and After Photos
Use the same:
- Camera and lens
- Room
- Lighting direction
- Camera distance
- Head position
- Facial expression
- Makeup status
- Time of day when possible
Recommended photograph intervals include:
- Before preparation products
- Immediately before treatment
- During the first week for recovery tracking
- At one month
- At three months
- At six months
- At 12 months when long-term tracking is useful
Do not compare a makeup-free before photograph taken under harsh lighting with an after photograph taken in soft light while wearing foundation.
How to Interpret CO2 Laser Before and After Photos
Before accepting a photograph as evidence, ask:
- Was the same lighting used?
- Is the patient wearing makeup?
- Is the facial expression identical?
- Was the photograph taken after one session or several?
- How long after treatment was the final image taken?
- Were filler, subcision, surgery or other procedures performed?
- Was the photograph filtered, sharpened or retouched?
- Does the patient have a similar skin tone and scar type?
An apparent laser result may also reflect:
- Temporary swelling
- Filler
- Subcision
- TCA CROSS
- Punch excision
- Facelift or eyelid surgery
- Injectable treatment
- Professional makeup
A credible CO2 laser before and after case study should disclose combination procedures rather than attributing the complete change to laser resurfacing alone.
Common CO2 Laser Before and After Mistakes
- Judging Results During the First Week: The first week shows wound healing, not the final outcome.
- Assuming Every CO2 Treatment Is Identical: Device, energy, density, pulse duration, passes and depth can create very different recoveries.
- Comparing Different Skin Concerns: A patient treating fine lines cannot be directly compared with someone treating deep acne scars.
- Ignoring Skin Tone: Settings that work for one patient may create unacceptable pigment risk for another.
- Expecting Ice-Pick Scars to Disappear: Deep, narrow scars often need targeted treatment before or alongside resurfacing.
- Treating Melasma Like Ordinary Sun Damage: Heat and inflammation can worsen melasma.
- Picking Crusts: Removing crusts can delay healing and increase infection, pigmentation and scarring.
- Restarting Active Skincare Too Soon: Retinoids, acids and scrubs can irritate a newly repaired skin barrier.
- Choosing a Provider Based Only on Price: Training, experience, patient selection, aftercare access and complication management matter more than the lowest advertised fee.
Red Flags When Choosing a CO2 Laser Provider
Be cautious when a clinic:
- Guarantees scar removal
- Promises a fixed percentage of improvement
- Does not identify the device or treatment method
- Cannot show comparable before-and-after cases
- Dismisses skin-tone or pigment concerns
- Does not ask about cold sores or medical history
- Provides no written aftercare plan
- Has no after-hours contact method
- Encourages treatment immediately before an important event
- Minimizes the possibility of infection or scarring
- Uses heavily edited photographs
- Pressures the patient to book immediately
- Cannot explain how complications are managed
Questions to Ask During Your Consultation
Ask:
- Which exact CO2 laser will you use?
- Is the procedure fractional or fully ablative?
- Why is this treatment appropriate for my concern?
- What settings are suitable for my skin tone?
- How many patients with my skin tone have you treated?
- Can I see unedited CO2 laser before and after photographs?
- How many sessions may I need?
- What social downtime should I expect?
- Which complications are most relevant to me?
- How do you reduce herpes and infection risk?
- Who should I contact outside office hours?
- How will pigmentation be treated if it develops?
- Do my scars require subcision or another procedure?
- When can I restart makeup and exercise?
- When can I resume retinoids and acids?
- What is included in the quoted cost?
- When will formal after photographs be taken?
Conclusion: CO2 laser before and after
CO2 laser before and after results should be evaluated over months, not during the first several days of redness, swelling and peeling.
The first week mainly reflects controlled injury and surface repair. Improvements in texture, wrinkles and acne scars become easier to judge as inflammation resolves and deeper remodeling continues.
Fractional treatment generally heals more quickly than traditional fully ablative resurfacing, but it can still involve significant downtime. Final CO2 laser before and after results depend on treatment intensity, skin tone, scar structure, practitioner skill and adherence to aftercare.
For a safe and realistic comparison:
- Review unedited photographs from comparable patients.
- Confirm whether treatment was fractional or fully ablative.
- Ask whether combination procedures were performed.
- Discuss pigment risk and contraindications.
- Follow wound-care and sun-protection instructions.
- Wait at least three to six months before judging the outcome.
CO2 resurfacing can produce meaningful improvement in appropriately selected patients, but it should be approached as a medical procedure rather than a quick cosmetic fix.
CO2 laser before and after FAQs
