


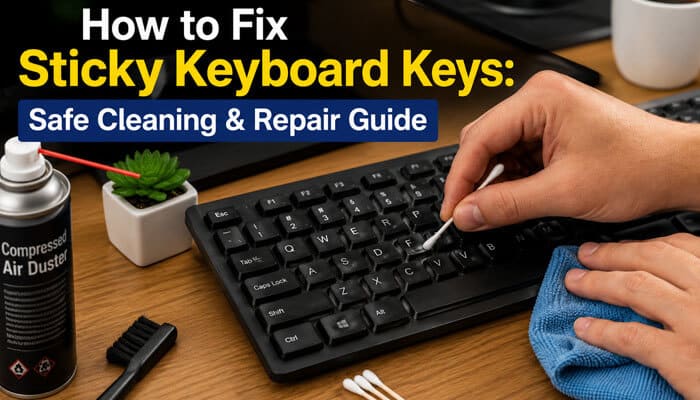

Sticky keyboard keys can make typing slow, annoying, and unreliable. Learning how to Fix Sticky Keyboard Keys can help restore smooth typing and prevent problems such as repeated letters, missed spaces, broken shortcuts, login issues, or an uncomfortable typing experience. Whether you use a laptop, MacBook, Chromebook, desktop keyboard, wireless keyboard, gaming keyboard, office keyboard, or mechanical keyboard, sticky keys usually happen when dust, crumbs, dried liquid, skin oil, pet hair, lint, or worn parts block normal key movement.
The good news is that many sticky keyboard problems can be fixed safely at home. You usually do not need to replace the entire keyboard right away. In many cases, careful cleaning with compressed air, a microfiber cloth, and a lightly dampened cotton swab can restore normal key movement. The important thing is to clean safely, avoid too much liquid, and never force fragile laptop keys.
This complete guide explains how to Fix Sticky Keyboard Keys step by step. You will learn what causes sticky keys, how to clean them safely, how to handle spills, how to clean laptop and mechanical keyboards, what products to avoid, when to check software settings, and when professional repair is the safer option.
Apple recommends using compressed air in a controlled way for affected MacBook keys. Dell recommends turning off the computer and using compressed air around a key that sticks. HP recommends compressed air plus careful cotton-swab cleaning for sticky laptop keys. These safety-first steps are important because keyboard openings are small, and too much liquid or pressure can damage internal parts.
Quick Answer: How to Fix Sticky Keyboard Keys
To fix sticky keyboard keys, turn off your computer or keyboard first. Unplug the keyboard, disconnect the charger, or remove batteries if possible. Gently turn the keyboard upside down and shake out loose crumbs. Use compressed air in short bursts around the sticky key. Then clean around the key edges with a cotton swab lightly dampened with isopropyl alcohol. Wipe the surface with a microfiber cloth and let the keyboard dry completely before testing it again.
If the key still sticks, the next step depends on the keyboard type. A removable desktop or mechanical keyboard keycap can often be removed and cleaned more deeply. A laptop key should only be removed if your device manufacturer supports it because laptop key hinges, clips, and stabilizers can break easily.
The safest way to approach how to Fix Sticky Keyboard Keys is to start with basic cleaning first, then move to deeper cleaning only if the key still feels slow, gummy, or stuck.
Key Takeaways
- Sticky keyboard keys are usually caused by crumbs, dust, dried spills, skin oils, grime, lint, pet hair, or damaged key mechanisms.
- Always turn off and unplug the keyboard or laptop before cleaning.
- Use compressed air first because it is safer for dry debris.
- Never pour water, alcohol, cleaner, or sanitizer directly onto the keyboard.
- Use a lightly dampened cotton swab to clean around key edges.
- Laptop keys are more fragile than desktop keycaps.
- Mechanical keyboard keycaps are usually easier to remove and clean.
- Sugary spills such as soda, juice, coffee, tea, and energy drinks can leave sticky residue under keys.
- If several keys fail after a spill, cleaning the surface may not be enough.
- Check software settings such as Windows Sticky Keys, Filter Keys, keyboard repeat delay, or gaming macros if the keyboard behaves strangely, but the key does not physically feel stuck.
What Are Sticky Keyboard Keys?
Sticky keyboard keys are physical keys that do not move smoothly when pressed. A sticky key may feel slow, stiff, crunchy, gummy, uneven, loose, delayed, or stuck halfway down. Sometimes the key goes down but does not come back up quickly. In other cases, the key works but repeats the same letter several times.
For example, you may press the “S” key once and see “ssss” on the screen. You may press the spacebar and notice it stays partly down. You may press Enter and feel one side move normally while the other side feels stuck.
Sticky keys can happen on:
- Laptop keyboards
- MacBook keyboards
- Chromebook keyboards
- Desktop keyboards
- USB keyboards
- Bluetooth keyboards
- Wireless keyboards
- Mechanical keyboards
- Gaming keyboards
- Membrane keyboards
- Office keyboards
The correct fix depends on the cause. A dusty key may only need compressed air. A key affected by soda, coffee, or juice may need residue cleaning. A broken laptop key hinge may need replacement. A keyboard damaged by liquid may need professional repair.
Understanding the cause is the first step in how to Fix Sticky Keyboard Keys safely. If you clean aggressively without knowing the problem, you may damage a key that only needed light dust removal.
Sticky Keyboard Keys vs Windows Sticky Keys
Before learning how to Fix Sticky Keyboard Keys, it is important to understand one common confusion. “Sticky keyboard keys” and “Sticky Keys” are not always the same thing.
Sticky keyboard keys are a physical hardware problem. The key is dirty, jammed, sticky, damaged, or blocked by debris.
Windows Sticky Keys is a software accessibility feature. It lets users press keyboard shortcut keys one at a time instead of holding multiple keys together. Microsoft lists pressing Shift five times as a shortcut to turn Sticky Keys on or off.
| Problem | Meaning | Best Fix |
| Physical sticky key | Key feels stuck, slow, or dirty | Clean the keyboard safely |
| Windows Sticky Keys | Accessibility feature changes shortcut behavior | Turn it off in accessibility settings |
| Repeating key | One press creates multiple letters | Clean the key and check repeat settings |
| Dead key | Key does not respond | Clean, test, and inspect for damage |
| Strange shortcuts | Accessibility, macro, or keyboard software issue | Check keyboard settings and software |
If the key physically feels sticky, follow the cleaning steps in this guide. If shortcut behavior changes but the key feels normal, check keyboard settings first.
Quick Diagnosis Before You Clean Sticky Keyboard Keys
Before cleaning, identify the real problem. Not every sticky key is caused by dirt. Sometimes the problem is a software setting, damaged hinge, broken stabilizer, worn switch, liquid damage, or keyboard driver issue.
| What You Notice | Possible Cause | What to Do First |
| One key feels slow or sticky | Dust, crumbs, or residue under key | Use compressed air and clean around the key |
| Several nearby keys feel sticky | Liquid spill or dried residue | Power off and clean carefully |
| Key repeats letters | Sticky switch, debris, or repeat setting | Clean key and check keyboard settings |
| Key does not respond | Dirt, broken switch, or hardware fault | Clean first, then test with another keyboard |
| Shortcuts behave strangely | Sticky Keys, Filter Keys, or macro software | Check software settings |
| Key feels loose | Broken clip, hinge, or stabilizer | Replace the keycap or repair the keyboard |
| Spacebar sticks on one side | Debris or stabilizer issue | Clean edges carefully and avoid force |
| Keys type wrong characters | Layout, software, liquid damage, or circuit issue | Check settings and test external keyboard |
This quick check prevents unnecessary damage. If the problem is simple dust, basic cleaning can help. If the problem is a broken part or liquid damage, aggressive cleaning may not solve it.
Common Causes of Sticky Keyboard Keys
Sticky keys usually happen when something blocks the normal movement of the keycap, switch, hinge, or membrane. Before you start cleaning, it helps to understand what may be causing the problem.
1. Dust and Crumbs
Dust and crumbs are among the most common causes of sticky keyboard keys. Eating near your laptop or keyboard allows tiny food particles to fall between the keys. Over time, these particles collect under keycaps and make keys feel rough, crunchy, or slow. This is usually the easiest problem to fix because dry debris can often be removed with gentle shaking, brushing, and compressed air.
2. Sugary Drink Spills
Soda, juice, sweet tea, sweet coffee, and energy drinks are serious causes of sticky keys. Even after the liquid dries, sugar remains under the keycap. That dried sugar creates a sticky film that makes keys feel gummy or stuck. Sugary spills are also risky because liquid may reach internal keyboard layers, laptop connectors, or circuits.
3. Coffee or Tea Residue
Coffee and tea can create sticky keyboard problems, especially if they contain sugar, milk, cream, or flavoring. Black coffee can still cause moisture damage, while sweet coffee can leave thick residue under the keys.
If you are searching for how to Fix Sticky Keyboard Keys after a coffee spill, act quickly. Turn off the device, unplug it, blot the liquid, and clean residue carefully only after the keyboard is safe to handle.
4. Skin Oils and Sweat
Daily typing leaves natural oils on keycaps. Over time, oils mix with dust and form grime around key edges. This is common on frequently used keys such as Space, Enter, Shift, Backspace, A, S, E, and arrow keys.
5. Pet Hair, Lint, and Fabric Fibers
Pet hair, blanket lint, clothing fibers, and dust can collect under keys. This often happens when people use laptops on beds, sofas, or near pets.
6. Damaged Keycap or Hinge
Laptop keys often use small plastic clips or scissor mechanisms. If a clip bends or breaks, the key may feel sticky, loose, uneven, or hard to press even after cleaning.
7. Worn Mechanical Switch
Mechanical keyboards use individual switches. If one switch becomes dirty, worn, or damaged, that key may stick or repeat. Some mechanical switches can be replaced, especially on hot-swappable keyboards.
8. Old Keyboard Membrane
Membrane keyboards use rubber domes or layers under the keys. With age, these parts can wear out. A key may feel soft, sticky, slow, or unresponsive even after cleaning.
Tools You Need to Fix Sticky Keyboard Keys
You do not need expensive tools for most keyboard cleaning. Basic cleaning supplies are enough for many sticky key problems.
| Tool | Purpose | Safety Tip |
| Compressed air | Removes dust, crumbs, lint, and hair | Use short bursts and keep the can upright |
| Microfiber cloth | Cleans key surfaces | Use slightly damp, not wet |
| Cotton swabs | Cleans around key edges | Lightly dampen the tip only |
| Isopropyl alcohol | Helps remove oils and sticky residue | Never pour directly onto keyboard |
| Soft brush | Loosens dry debris | Use gentle pressure |
| Keycap puller | Removes mechanical keycaps | Use only on removable keycaps |
| Small bowl | Soaks removable keycaps | Dry keycaps fully before reinstalling |
| Phone camera | Records keyboard layout | Helpful before removing multiple keycaps |
HP says compressed air can safely remove dust and debris from between laptop keyboard keys when used in short bursts, and for sticky laptop keys it recommends a cotton swab lightly dampened with isopropyl alcohol while avoiding drips into the keyboard.
Cleaning Products You Should Never Use
Using the wrong cleaning product can damage the keyboard more than the sticky key itself. Keyboards have small openings, plastic clips, printed key legends, membranes, switches, stabilizers, and electronic circuits.
Avoid these products:
| Product | Why You Should Avoid It |
| Bleach | Too harsh for keyboard plastics and printed letters |
| Window cleaner | Can leave residue or damage coatings |
| Soapy water directly on keyboard | Can seep into circuits |
| Hand sanitizer | May contain gels, fragrance, or additives |
| Too much rubbing alcohol | Can damage printed legends if overused |
| Vinegar | Strong smell and possible residue |
| Hair dryer heat | Can warp plastic or push moisture deeper |
| Metal tools | Can break clips, scratch keys, or damage switches |
| Strong vacuum suction | Can pull off loose keycaps or small parts |
| Abrasive wipes | Can wear down key labels or surface texture |
Use only a slightly damp microfiber cloth, compressed air, and a lightly dampened cotton swab when needed. The safest rule is simple: dampen the cloth or swab, not the keyboard.
Safety Rules Before You Start
Keyboard cleaning is simple, but careless cleaning can cause permanent damage. Follow these safety rules before cleaning sticky keys.
Turn Off the Device
Always shut down the laptop or computer before cleaning. If you are using an external keyboard, unplug it. If it is wireless, turn it off and remove batteries if possible.
Do Not Pour Liquid on the Keyboard
Never pour water, alcohol, cleaner, sanitizer, or any liquid directly onto the keyboard. Liquid can enter the keyboard layers and damage switches, membranes, connectors, or circuits.
Use Minimal Moisture
A cloth or cotton swab should be slightly damp, not wet. If liquid can drip from it, it is too wet.
Do Not Force Laptop Keys
Laptop key mechanisms are delicate. If a key does not lift easily, do not force it. Breaking the hinge may turn a small cleaning problem into a repair problem.
Let the Keyboard Dry
Even isopropyl alcohol needs time to evaporate. Let the keyboard dry completely before reconnecting or turning it on.
Check Warranty Before Deep Cleaning
If the laptop is expensive, new, or under warranty, check the manufacturer’s guidance before removing keys. Self-repair may make later service more difficult.
Step-by-Step Guide: How to Fix Sticky Keyboard Keys
This safe method works for most laptops, desktop keyboards, wireless keyboards, and office keyboards. Start here before trying key removal or deeper repair.
Step 1: Shut Down and Disconnect
Turn off your laptop or computer. If you are using a wired keyboard, unplug it. If it is wireless, remove the batteries if possible.
Do not clean while the device is running. Pressing keys during cleaning can open apps, trigger shortcuts, delete text, or cause accidental commands.
Step 2: Identify the Sticky Keys
Press each key gently and note which ones feel sticky.
Look for these symptoms:
- Key feels slow to return
- Key makes a crunchy sound
- Key repeats letters
- Key needs extra pressure
- Key stays partly down
- Key works only sometimes
- Key feels uneven on one side
- Spacebar sticks near the edge
If only one key is sticky, debris may be under that key. If several keys in one area are sticky, a spill is more likely.
Step 3: Turn the Keyboard Upside Down
Hold the keyboard carefully upside down or at an angle. Gently shake it to loosen crumbs and dust.
For a laptop, be gentle. Do not hit or slap the device. The goal is to remove loose debris, not damage the screen, hinge, or internal parts.
Step 4: Use Compressed Air
Use compressed air around the sticky key in short bursts. Move around the key from different angles.
Dell recommends turning off the computer and using compressed air around a key that sticks, while Apple recommends a specific compressed-air process for affected MacBook keys.
Use these tips:
- Keep the can upright.
- Use short bursts.
- Do not spray too close.
- Do not tilt the can too much.
- Do not shake the can aggressively.
- Do not spray liquid propellant into the keyboard.
- Move around the key from different sides.
Compressed air works best for dry crumbs, dust, lint, and hair. It may not fully remove dried sugar or drink residue.
Step 5: Clean Around the Key Edges
Take a cotton swab and lightly dampen it with isopropyl alcohol. It should not drip. Gently clean around the edges of the sticky key.
Move slowly around all sides of the key. Press the key lightly while cleaning the edges to expose small gaps. Do not push the swab deep into the keyboard.
This step helps remove:
- Dried soda residue
- Oil buildup
- Dust mixed with sweat
- Sticky grime around the keycap
- Light spill residue near the surface
Step 6: Wipe the Key Surface
Use a microfiber cloth to wipe the key surface and surrounding keys. If needed, slightly dampen the cloth. Then wipe again with a dry microfiber cloth.
Do not use rough cloths, paper towels that shed fibers, or harsh cleaning wipes.
Step 7: Let the Keyboard Dry
Leave the keyboard off for at least 15 to 30 minutes after light cleaning. If you cleaned after a spill, wait longer. For serious spills, drying may take many hours.
Step 8: Test the Key
Turn the keyboard back on or reconnect it. Open a simple text editor and test the key.
Check:
- Does the key press smoothly?
- Does it return quickly?
- Does it type only once?
- Does it work in all apps?
- Does it still feel sticky?
- Does it feel loose or uneven?
If the key works normally, the problem is fixed. If it is still sticky, you may need deeper cleaning, software checks, or repair.
How to Fix Sticky Keyboard Keys on a Laptop
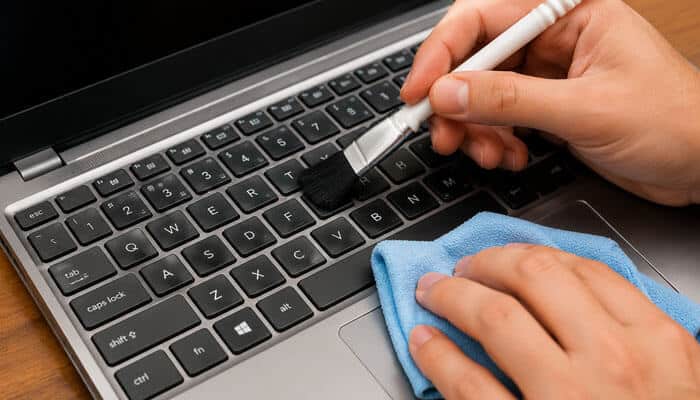
Laptop keyboards need extra care because the keys are thinner and more fragile than desktop keys. Many laptop keys use small plastic hinges, clips, or scissor mechanisms.
Basic Laptop Keyboard Cleaning Method
- Shut down the laptop.
- Unplug the charger.
- Remove the battery if it is removable.
- Tilt the laptop slightly upside down.
- Gently shake out crumbs.
- Use compressed air around the sticky key.
- Clean around the key edges with a lightly dampened cotton swab.
- Wipe the surface with a microfiber cloth.
- Let the keyboard dry.
- Test the key.
This is the safest method for most laptop users.
Should You Remove Laptop Keys?
You should remove laptop keys only if the manufacturer allows it and you understand the key mechanism. Many laptop keys can break easily. Larger keys such as Spacebar, Shift, Enter, and Backspace often have stabilizer bars, which are harder to reattach.
Avoid removing laptop keys if:
- The laptop is under warranty.
- You do not know the exact key design.
- The key is large and uses stabilizers.
- The key does not lift easily.
- The laptop had liquid damage.
- Replacement parts are not available.
- You need to force the keycap.
For expensive laptops, professional repair is often safer than forcing a keycap off.
How to Fix Sticky Keyboard Keys on a MacBook
MacBook keyboards should be cleaned carefully because many models use thin, low-profile key mechanisms. Apple recommends holding the Mac notebook at a 75-degree angle and using compressed air to spray the keyboard or affected keys in a controlled pattern.
For MacBook users:
- Shut down the MacBook first.
- Do not remove keycaps unless you know the exact model-specific method.
- Do not spray cleaner directly into the keyboard.
- Do not use excessive liquid.
- Follow Apple’s compressed-air instructions.
- Seek service if keys remain stuck or unresponsive.
MacBook keycaps and mechanisms can be delicate. If compressed air and light cleaning do not help, service is safer than force.
How to Fix Sticky Keyboard Keys on a Chromebook
Chromebook keyboard cleaning is similar to laptop keyboard cleaning.
Steps:
- Shut down the Chromebook.
- Unplug the charger.
- Tilt the Chromebook slightly.
- Use compressed air around the sticky key.
- Clean around the key edges with a lightly dampened cotton swab.
- Let it dry completely.
- Restart and test the key.
Avoid removing Chromebook keys unless you are sure they are removable.
How to Fix Sticky Keyboard Keys on a Desktop Keyboard
Desktop keyboards are usually easier to clean than laptop keyboards. Many external keyboards have removable keycaps, especially mechanical keyboards and some older membrane keyboards.
Basic Desktop Keyboard Cleaning
- Unplug the keyboard.
- Turn it upside down and shake gently.
- Use compressed air between the keys.
- Brush loose debris from the surface.
- Wipe keycaps with a microfiber cloth.
- Clean sticky keys with a lightly dampened cotton swab.
- Let the keyboard dry.
- Plug it back in and test.
If the keyboard is inexpensive and badly damaged by liquid, replacement may be more practical than deep repair.
Removing Desktop Keycaps
If your desktop keyboard keycaps are removable:
- Take a photo of the layout first.
- Remove only affected keys if you are unsure.
- Use a keycap puller if available.
- Clean the exposed area with compressed air.
- Clean residue with a lightly dampened cotton swab.
- Wash only the plastic keycaps, not the keyboard body.
- Dry keycaps fully before reinstalling.
Never soak the full keyboard unless it is specifically designed to be washable.
How to Fix Sticky Keyboard Keys on a Mechanical Keyboard
Mechanical keyboards are often easier to clean because many keycaps are removable. This makes them more repair-friendly than most laptop keyboards.
Mechanical Keyboard Cleaning Tools
You may need:
- Keycap puller
- Compressed air
- Soft brush
- Cotton swabs
- Isopropyl alcohol
- Microfiber cloth
- Bowl of warm soapy water for keycaps
- Towel for drying keycaps
For mechanical keyboard maintenance, HP recommends tools such as compressed air, high-percentage isopropyl alcohol, a keycap puller, a soft-bristle brush, and a microfiber cloth.
Step-by-Step Mechanical Keyboard Cleaning
- Unplug the keyboard.
- Take a photo of the layout.
- Remove the sticky keycap with a keycap puller.
- Inspect the switch and surrounding area.
- Use compressed air to remove debris.
- Clean around the switch with a lightly dampened cotton swab.
- Wash the removed keycap in warm soapy water if needed.
- Let the keycap dry completely.
- Reinstall the keycap.
- Test the key.
Cleaning Sticky Keycaps
If the keycap itself is sticky:
- Remove it carefully.
- Soak it in warm soapy water.
- Gently scrub with a soft cloth.
- Rinse with clean water.
- Dry with a towel.
- Air-dry completely.
- Reinstall only when fully dry.
Do not reinstall damp keycaps. Water trapped inside a keycap can drip into the switch.
Sticky Mechanical Switches
If the keycap is clean but the switch still sticks, debris or residue may be inside the switch. For hot-swappable keyboards, replacing the switch may be easier. For soldered keyboards, switch replacement requires soldering skills. If the keyboard is expensive, professional repair may be worth considering.
How to Fix Sticky Keyboard Keys After a Spill
Spills are one of the most serious causes of sticky keys. A small amount of water may dry without sticky residue, but sugary drinks can leave a sticky film. Coffee, tea, soda, juice, milk, and energy drinks can cause both stickiness and electrical damage.
Warning Before Cleaning a Spill
If liquid entered a laptop, do not keep turning it on to test whether it still works. Repeated testing can increase the risk of electrical damage. Turn it off, unplug it, blot visible liquid, and consider professional repair if the spill was large or sugary.
What to Do Immediately After a Spill
- Turn off the device immediately.
- Unplug the charger or keyboard cable.
- Remove batteries if possible.
- Disconnect external devices.
- Turn the keyboard upside down to drain liquid.
- Blot visible liquid with a microfiber cloth.
- Do not press many keys.
- Do not use heat.
- Let the keyboard dry.
- Clean residue carefully.
- Test only after drying.
For a laptop, a spill can reach internal components below the keyboard. Even if the keyboard works at first, corrosion or electrical problems can appear later.
What to Do Based on the Type of Spill
Different spills create different risks. This table helps you choose the safest response.
| Spill Type | Main Risk | Best Action |
| Plain water | Short circuit or corrosion | Power off, drain, dry completely |
| Black coffee | Moisture and staining | Power off, blot, dry, clean affected keys |
| Coffee with sugar or milk | Sticky residue, odor, and corrosion | Clean residue carefully and monitor keys |
| Soda | Dried sugar under keys | Power off immediately and clean deeply |
| Juice | Sugar and acid residue | Clean affected keys and dry fully |
| Tea with sugar | Sticky film under keycaps | Clean with cotton swab and compressed air |
| Milk | Odor, residue, and hygiene issue | Professional cleaning is safer |
| Energy drink | Sugar and sticky chemical residue | Clean quickly and consider repair |
If the spill was large or reached laptop internals, do not keep powering the device on and off. Repeated testing can increase the risk of damage.
Do Not Use a Hair Dryer
A hair dryer can push liquid deeper into the keyboard. Heat can also warp plastic, damage adhesives, or affect internal parts. Air-drying is safer.
How Long Should a Keyboard Dry After a Spill?
For light surface cleaning, 15 to 30 minutes may be enough. For a liquid spill, drying may take much longer. If liquid entered a laptop, professional inspection is safer than guessing.
When a Spill Needs Professional Repair
Get professional help if:
- The laptop will not turn on.
- Several keys stopped working.
- Keys type wrong characters.
- The trackpad also behaves strangely.
- The screen flickers after the spill.
- The laptop heats unusually.
- There is a burning smell.
- Liquid entered the laptop body.
- Corrosion is visible.
- The device is expensive or under warranty.
Cleaning the top of the keyboard cannot fix liquid damage on the motherboard, internal connectors, or deeper circuits.
How to Fix a Sticky Key Without Removing It
For many users, this is the safest method because it avoids breaking key clips.
- Turn off and unplug the device.
- Hold the keyboard at an angle.
- Use compressed air around the sticky key.
- Press the key gently several times.
- Clean around the edges with a lightly dampened cotton swab.
- Wipe with a dry microfiber cloth.
- Let it dry.
- Test again.
Repeat this process two or three times if the key improves but still feels slightly sticky. This method is especially useful for people searching for how to Fix Sticky Keyboard Keys without removing laptop keys.
How to Fix Sticky Keyboard Keys on a Laptop Without Removing Keys
This method is best for modern laptops, thin keyboards, and users who do not want to risk damaging key mechanisms.
Steps:
- Shut down the laptop.
- Unplug the charger.
- Tilt the laptop slightly.
- Spray compressed air around the sticky key.
- Use a soft brush around the key.
- Clean the key edges with a lightly dampened cotton swab.
- Press the key gently to work around the edges.
- Wipe dry.
- Wait before turning it on.
This approach works best for light stickiness caused by dust, crumbs, and minor residue.
How to Fix a Sticky Spacebar
The spacebar is one of the most common sticky keyboard keys. It is also one of the easiest keys to damage during removal because it often has stabilizer clips.
To clean a sticky spacebar safely:
- Turn off and unplug the device.
- Use compressed air along both long edges.
- Clean around the edges with a lightly dampened cotton swab.
- Press the left, center, and right sides gently.
- Repeat compressed air from different angles.
- Avoid removing it unless you know the stabilizer design.
If the spacebar still sticks after cleaning, the stabilizer may be bent, loose, disconnected, or damaged.
How to Fix Sticky Shift, Enter, and Backspace Keys
Large keys are harder to clean because they often use stabilizers. Do not pull them off quickly.
Safe method:
- Use compressed air along all edges.
- Clean around the key with a cotton swab.
- Press the left and right sides gently.
- Check whether one side feels stuck.
- Avoid removing the key unless you know the mechanism.
If the key is uneven, loose, or hard to reattach, the stabilizer may be damaged.
How to Fix Sticky Arrow Keys
Arrow keys collect dust and crumbs because they are small and close together.
Cleaning method:
- Use compressed air around all arrow keys.
- Brush between the key gaps.
- Clean each edge with a lightly dampened cotton swab.
- Test each arrow key separately.
If all arrow keys fail at once, the issue may be software or hardware failure, not just dirt.
How to Know If the Problem Is Hardware or Software
Sometimes a key seems sticky, but the real problem is software settings, drivers, keyboard repeat delay, accessibility features, or gaming keyboard software.
Test in Different Apps
Open a text editor, browser search box, and document app. If the same key repeats everywhere, the issue is more likely hardware.
Use an External Keyboard
If your laptop key sticks but an external keyboard works normally, the built-in keyboard is likely the problem.
Check Accessibility Settings
Check these settings:
- Sticky Keys
- Filter Keys
- Toggle Keys
- Keyboard repeat delay
- Keyboard repeat rate
- Keyboard layout
- Gaming keyboard macros
- Keyboard driver software
Microsoft lists Shift pressed five times for turning Sticky Keys on or off, and Right Shift pressed for eight seconds for Filter Keys, so users may accidentally enable accessibility shortcuts while typing or gaming.
Restart the Computer
A restart can fix temporary software glitches, but it will not fix a physically dirty or damaged key.
Test Before the Operating System Loads
Advanced users can test keys in BIOS, UEFI, startup screens, or recovery mode. If a key fails before Windows or macOS loads, the issue is more likely hardware.
Sticky Keyboard Keys Troubleshooting Flowchart
Use this simple troubleshooting path:
- Turn off and unplug the device.
- Check whether the key physically feels sticky.
- If yes, use compressed air around the affected key.
- Clean around the key edges with a lightly dampened cotton swab.
- Let the keyboard dry completely.
- Test the key in a text editor.
- If the key works normally, continue regular maintenance.
- If the key still sticks, check for spill residue.
- If it was a spill, clean carefully and allow longer drying time.
- If the key is loose, uneven, or broken, inspect the hinge or switch.
- If several keys fail, test with an external keyboard.
- If the external keyboard works, the built-in keyboard may need repair.
- If the problem continues after cleaning, replace the key, switch, or keyboard.
Troubleshooting Table: Sticky Keyboard Key Problems and Fixes
| Symptom | Likely Cause | Safe Fix |
| One key feels sticky | Crumb, dust, or residue | Use compressed air and clean key edges |
| Key repeats letters | Sticky switch, setting, or damage | Clean key and check repeat settings |
| Spacebar sticks on one side | Debris or stabilizer issue | Clean edges carefully |
| Several nearby keys sticky | Spill residue | Power off, clean, and dry |
| Keys do not work after spill | Internal liquid damage | Professional repair |
| Key feels loose | Broken clip or hinge | Replace keycap or keyboard part |
| Mechanical key still sticks | Switch issue | Clean or replace switch |
| Laptop key will not reattach | Broken scissor mechanism | Replace key or seek repair |
| Sticky Keys pop-up appears | Windows accessibility shortcut | Turn off Sticky Keys |
| Keyboard types random letters | Liquid damage or circuit issue | Stop using and repair |
When Cleaning Is Not Enough
Cleaning can fix many sticky keyboard keys, but not all. Sometimes the key mechanism, switch, membrane, stabilizer, connector, or circuit is damaged.
Cleaning may not work if:
- The key hinge is broken.
- The rubber dome is worn out.
- The switch is damaged.
- Liquid reached internal circuits.
- The keycap clip is cracked.
- The keyboard cable is damaged.
- Corrosion has started.
- The keyboard is very old.
- Several keys fail at the same time.
- Keys type the wrong characters after a spill.
In these cases, repair or replacement is usually better.
Repair Options for Sticky Keyboard Keys
Replace One Keycap
If only the keycap is broken, you may be able to replace the individual keycap. This is common for laptops, but you need the exact model, key size, and hinge type.
Replace the Mechanical Switch
For mechanical keyboards, replacing one switch may solve the problem. Hot-swappable keyboards make this easier. Soldered keyboards require more skill and tools.
Replace the Full Keyboard
For many laptops, the safest repair is replacing the full keyboard assembly. This is common after liquid damage, broken scissor mechanisms, or multiple dead keys.
Use an External Keyboard
If laptop repair is expensive, an external keyboard can be a temporary solution. This is useful when the laptop still works but the built-in keyboard is unreliable.
Get Professional Cleaning
Professional cleaning is useful after major spills, especially on expensive laptops. A technician can inspect internal connectors, corrosion, and hidden liquid damage.
Cost Considerations
| Option | Best For | Cost Level |
| Basic cleaning | Dust, crumbs, light residue | Low |
| Keycap replacement | Broken single keycap | Low to medium |
| Mechanical switch replacement | One faulty switch | Low to medium |
| External keyboard replacement | Cheap damaged keyboard | Low to medium |
| Laptop keyboard replacement | Damaged built-in keyboard | Medium to high |
| Professional liquid damage repair | Major spills | Medium to high |
Warranty and Manufacturer Safety Warning
Before removing laptop keys, check your warranty and manufacturer guidance. Many laptop keyboards use delicate clips, scissor switches, or low-profile mechanisms. If these parts break, the key may not attach properly again.
You should avoid self-repair if:
- The laptop is still under warranty.
- You are unsure how the key mechanism works.
- The affected key is Spacebar, Shift, Enter, or Backspace.
- The keyboard was damaged by a spill.
- The key does not lift easily.
- The laptop is expensive.
- You cannot find replacement parts.
For valuable laptops, professional repair is often safer than forcing a keycap off.
How to Prevent Sticky Keyboard Keys
Prevention is easier than repair. A few simple habits can keep your keyboard clean and smooth.
1. Keep Food Away From the Keyboard
Crumbs are one of the biggest causes of sticky keys. Avoid eating directly over your laptop or keyboard.
2. Keep Drinks Away
Place drinks away from the keyboard. Use a bottle with a cap instead of an open cup.
3. Clean Weekly
A weekly wipe with a microfiber cloth can prevent oil and dust buildup.
4. Use Compressed Air Monthly
Use compressed air occasionally to remove hidden debris before it builds up.
5. Wash Hands Before Typing
Clean hands reduce oil, sweat, and grime on keycaps.
6. Use a Keyboard Cover Carefully
A keyboard cover can protect from dust and light spills, but it may affect typing feel and heat flow on some laptops. Use one only if it fits properly.
7. Store External Keyboards Properly
If you do not use an external keyboard often, cover it or store it away from dust.
8. Clean Spills Immediately
The faster you respond to a spill, the better your chance of preventing sticky residue and damage.
Simple Keyboard Cleaning Schedule
| Frequency | Task | Why It Helps |
| Daily | Wipe visible dust and oil | Keeps key surfaces clean |
| Weekly | Clean with a microfiber cloth | Prevents grime buildup |
| Monthly | Use compressed air | Removes hidden crumbs and dust |
| Every 3–6 months | Deep clean removable keycaps | Useful for mechanical keyboards |
| After any spill | Power off and clean immediately | Reduces residue and damage risk |
Best Practices for Different Keyboard Types
| Keyboard Type | Best Cleaning Method | Avoid |
| Laptop keyboard | Compressed air, microfiber cloth, cotton swab | Forcefully removing keys |
| MacBook keyboard | Follow Apple compressed-air guidance | Excess liquid or random key removal |
| Mechanical keyboard | Remove keycaps if supported | Reinstalling wet keycaps |
| Membrane desktop keyboard | Shake, air, wipe, selective cleaning | Soaking full keyboard |
| Wireless keyboard | Remove batteries before cleaning | Cleaning while powered on |
| Gaming keyboard | Clean keycaps and switch area carefully | Harsh cleaners near RGB parts |
Helpful Official Resources
For better safety and trust, check official cleaning or troubleshooting guidance before cleaning an expensive laptop or keyboard.
| Resource | Why It Helps |
| Apple MacBook keyboard cleaning guidance | Useful for MacBook users with sticky or unresponsive keys |
| HP laptop keyboard cleaning guidance | Helpful for compressed air and sticky-key cleaning safety |
| Dell keyboard troubleshooting guidance | Helpful for stuck, loose, or damaged keys |
| Microsoft keyboard accessibility guidance | Helpful if the issue is Sticky Keys or Filter Keys |
| Google people-first content guidance | Helpful for keeping repair content useful, accurate, and user-focused |
Google’s guidance on helpful content emphasizes creating content primarily for people, not just for search engines. This article follows that approach by giving practical steps, safety warnings, troubleshooting tables, and repair guidance instead of only repeating the focus keyword.
Conclusion: How to Fix Sticky Keyboard Keys
Sticky keyboard keys are annoying, but many can be fixed safely with careful cleaning. Start with the least risky method: turn off and unplug the device, remove loose debris, use compressed air, clean around the sticky key with a lightly dampened cotton swab, and let everything dry completely.
For laptops, be extra careful because key hinges and clips are delicate. For mechanical keyboards, removing keycaps and cleaning around the switch is usually easier. If the sticky key was caused by a major spill, or if several keys stop working, cleaning may not be enough. In that case, professional repair or keyboard replacement is the safer choice.
The best way to avoid future sticky keys is simple: keep food and drinks away from your keyboard, clean it regularly, and respond quickly to spills. With the right method, you can restore smooth typing, reduce typing errors, and extend the life of your keyboard.
If you want the safest and most effective approach, remember this simple rule: How to Fix Sticky Keyboard Keys starts with gentle cleaning first, not force. Use compressed air, minimal moisture, and patience before trying key removal or replacement.
How to Fix Sticky Keyboard Keys FAQs
1. How do I fix sticky keyboard keys at home?
To fix sticky keyboard keys at home, turn off and unplug the device, gently shake out loose debris, use compressed air around the affected key, clean the edges with a cotton swab lightly dampened with isopropyl alcohol, wipe with a microfiber cloth, and let the keyboard dry before testing.
2. Can I fix sticky keyboard keys without removing the keys?
Yes, many sticky keyboard keys can be fixed without removing the keys. Use compressed air around the key, clean the edges with a lightly dampened cotton swab, and wipe the key surface. This is the safest method for most laptops.
3. Why are my keyboard keys sticky after a spill?
Keyboard keys become sticky after a spill because drinks like soda, juice, coffee, and tea can leave dried sugar, milk, or residue under the keycaps. This residue can block smooth key movement and may also damage internal keyboard parts.
4. Is it safe to use alcohol to clean sticky keyboard keys?
Isopropyl alcohol can be used carefully on a cloth or cotton swab to clean sticky residue, but it should never be poured directly onto the keyboard. Use only a small amount and let the keyboard dry before turning it back on.
5. Can compressed air fix sticky keyboard keys?
Compressed air can fix sticky keyboard keys when the problem is caused by dust, crumbs, lint, or dry debris. It may not fully fix keys affected by dried soda, coffee, juice, or sticky liquid residue.
6. What is the easiest method for How to Fix Sticky Keyboard Keys?
The easiest method for How to Fix Sticky Keyboard Keys is to power off the device, shake out loose debris, use compressed air around the affected key, clean the key edges with a lightly dampened cotton swab, and let the keyboard dry before testing.
